support hotline
0577-57572522
In order to give full play to the characteristics of this product, please read this manual carefully before use, and keep it for reference. The instructions and information on the multifunctional digital radius tester in this manual are subject to change without notice.
Ø Precautions before use
If there is dirt or other dirt on the measuring rod of the radius tester, it will affect the movement of the measuring rod, so please wipe it with a clean cloth without oil before use.
Wipe the tester case and measuring claws with a soft, dry cloth. If there is serious dirt on the case, wipe it with a damp cloth containing a neutral detergent. Do not use volatile solvents such as thinner, as this will damage the case.
If the data port is not used, please cover the data port to protect the data port.
Use a damp cloth containing alcohol to clean the probe. Do not apply oil to the probe!
Unauthorized personnel should not disassemble and repair the digital display radius meter by yourself, so as not to damage the instrument.
This instrument is not waterproof. Please keep it dry.
If the probe needs to be replaced, please fix the measuring rod before replacing.
Ø Product introduction
In engineering measurement, the measurement of the radius of the circular arc generally uses the R gauge (also known as the R gauge) to compare the measurements. Due to the limited specifications of the R gauge template, only the standard arc surface radius on the R gauge template can be measured. And for comparative measurement, the actual precise value of the workpiece to be measured cannot be measured. Most other non-standard arcs (specifications not available on the R template) cannot be accurately measured. In addition, there are many specifications of the R template. It takes a long time in actual measurement to select a sample of a suitable specification, and the measurement efficiency is extremely low. This product uses high-tech achievements such as grid sensors and integrated circuits, and combines mechanical, electronic, computer and sensor technologies to develop a new generation of high-tech circular arc radius measuring instruments. The product can measure arbitrary The actual value of the radius of the arc-shaped surface of the specification, the operation is simple, and the reading is fast. It has the characteristics of small size, convenient reading, and handheld measurement, and can be used on the production site. The tester is particularly suitable for the measurement of the radius of the arc surface of plastic molds, bearings, auto parts and other industries.
Ø Product Features
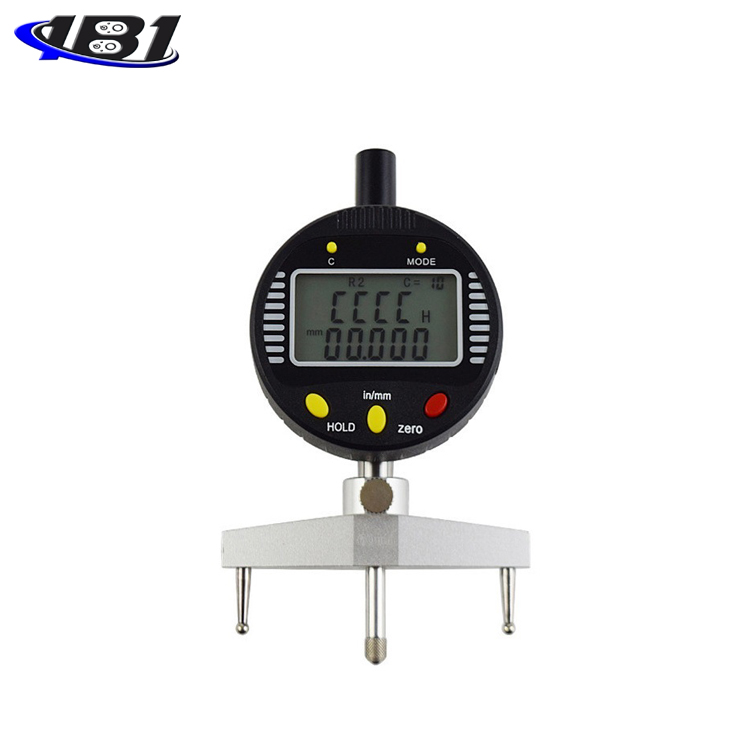
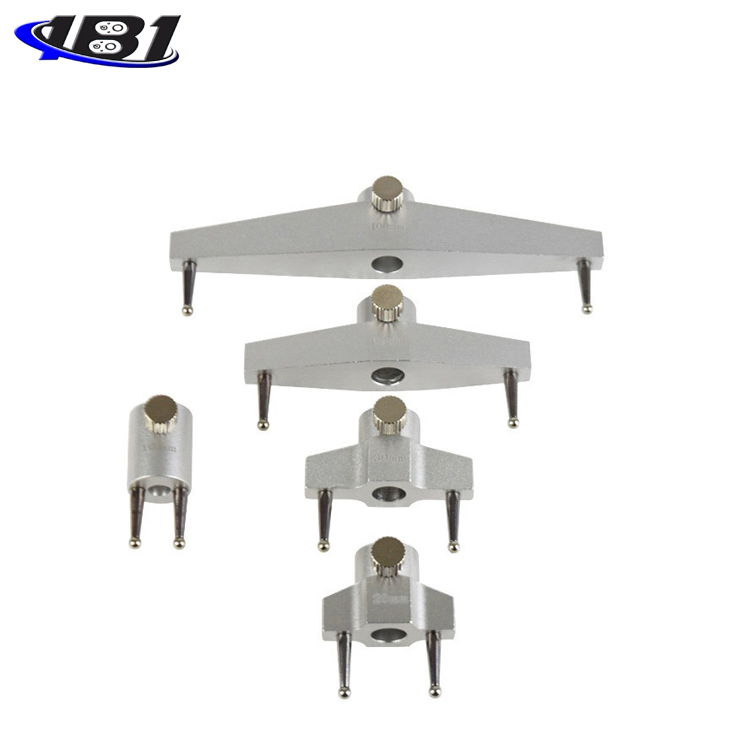
This tester uses five sets of jaw design. For different circular arc surfaces and measurement accuracy, different measuring jaws are used.
This instrument has multiple uses:
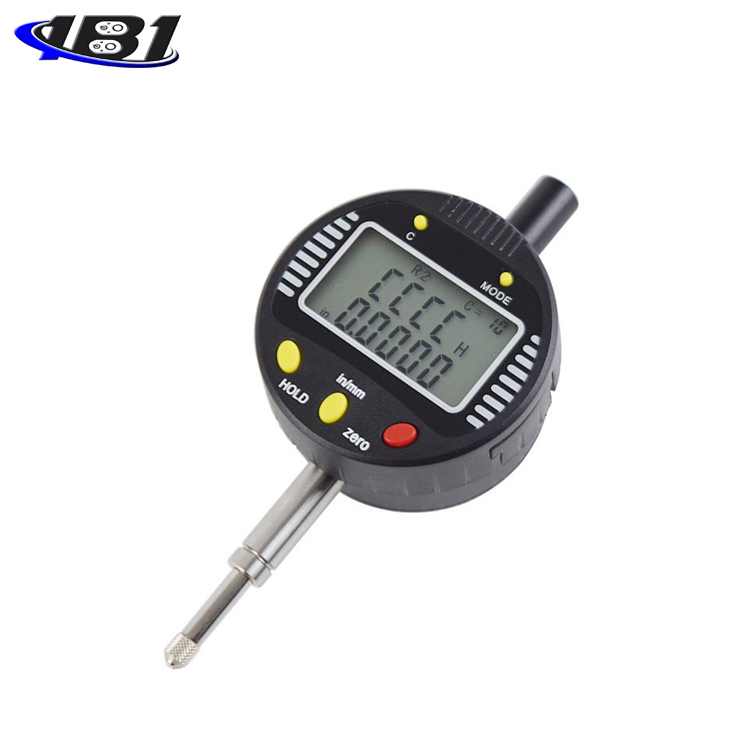
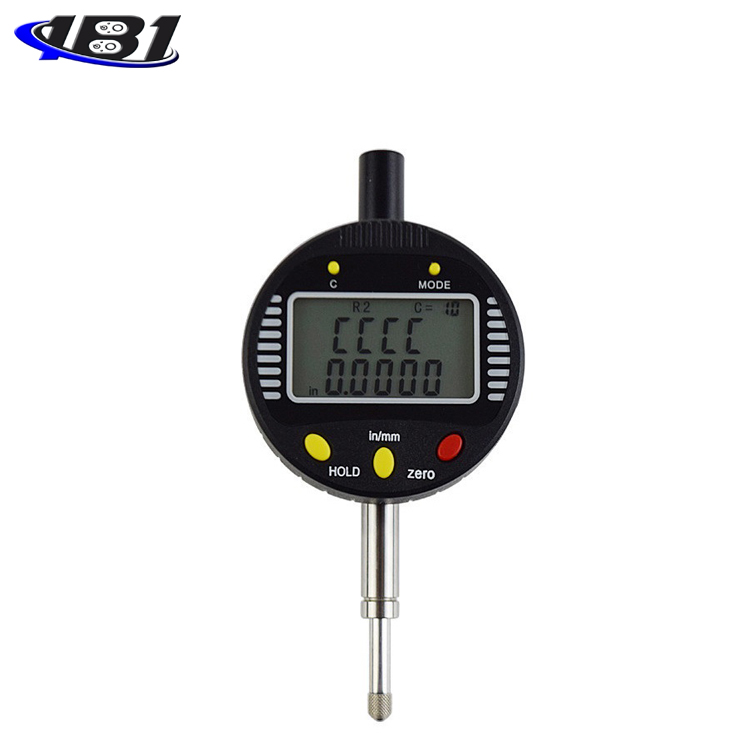
u High-precision digital dial indicator function (remove the claw) Measuring the radius of the outer arc surface
u Radius measurement of inner arc surface Depth measurement Step measurement
Ø Main technical parameters
Measuring range: length displacement 0-13mm Power supply: 3V lithium battery (CR2032)
Radius range 5-9999.9mm Working temperature: 0 --- ± 40 ℃
Displacement measurement error: ΔS≤0.02mm Humidity effect: Relative humidity ≤80% is not affected
Radius measurement error: ΔR≤0.02 Temperature storage and transportation: ﹣20 ℃ ---- ± 60 ℃
Note: R is the radius to be measured, and S is the corresponding displacement value.
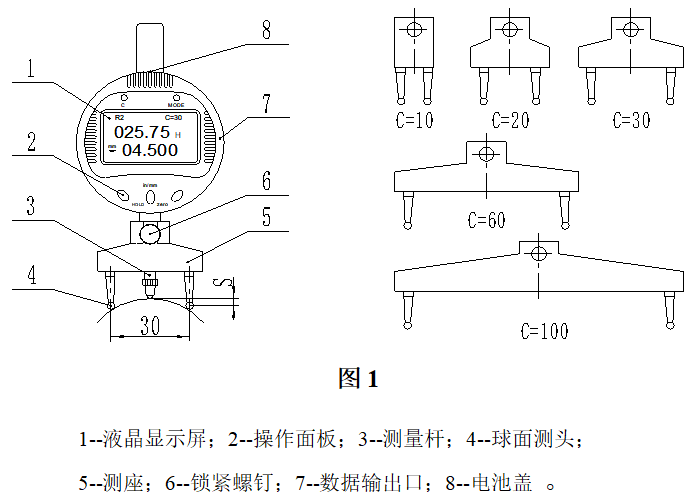
Structure diagram
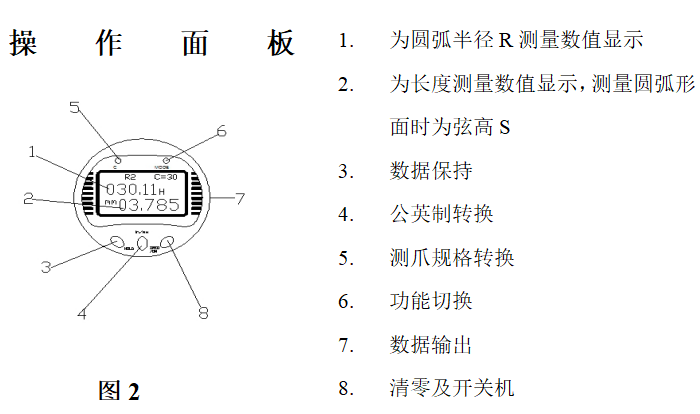
Function Specific operation
Switch on Press the ZERO / ON / OFF button once
Clear Zero Press the ZERO / ON / OFF key to clear it at any position. When measuring the inner and outer diameters, you must follow the diagram shown in a in Figure 3 to let the three shots and a standard tablet
Metric and imperial conversion Press UNIT to switch between metric and imperial
Data hold and release Press the HOLD key, the H character is displayed on the LCD screen, indicating that the data is in the hold state. Press this key again to release the hold state
Function switching This product can measure the radius, length, depth, and step of the inner and outer arc surface. Press the MODE key to switch the function. When the first row of the window is displayed as R1, the system enters the inner arc radius measurement state, which is displayed as At R2, the system enters the state of measuring the radius of the outer arc surface. When it is displayed as A, it indicates the slope. The third row of the window reads (string height S value) length, depth, and step measurements. Figure C shows the measurement of the inner diameter R. During the measurement, the ball head of the three measuring rods should be in contact with the measured arc at the same time, and the plane where the axis of the three measuring rods is located is coplanar with the measured arc, and the radius and String height as shown.
Note: R1 and R2 status system will automatically switch according to your measured status!
Power off Press and hold the ZERO / ON / OFF button for a long time to turn off the power, or turn off the power automatically after a few minutes of non-use.
Claw replacement You can select a suitable claw according to the size of the object to be measured. Generally speaking, a large claw is selected for a large radius. The claws are numbered 10, 20, 30, 60, 100 from small to large. After replacing the claws, press the C key to change the C value (that is, the claw specifications). C = 10, 20, 30 will be displayed on the screen in order , 60, 100, make the claw number correspond to the C value, if you choose the 30 claw, you should make C = 30.
R gauge measurement guide
Outer diameter: optimal measuring range
C = 10 R = 5-> 13MM
C = 20 R = 11-> 30MM
C = 30 R = 22-> 100MM
C = 60 R = 94-> 260MM
C = 100 R = 255-> 700MM

image 3
C: indicates the center distance of the rods on both sides S: indicates the amount of movement of the middle rod relative to the rods on both sides
R: the measured arc radius
General faults and solutions
Problem Cause Solution
Digital flashes quickly Low battery power Replace new battery
The display cannot count. The circuit has accidentally failed. Remove the battery and reinstall it after 30 seconds.
No display on the display 1. Bad battery contact 1. Clean the tester battery contacts
2. Battery voltage is too low 2. Replace with new battery