support hotline
0577-57572522
I. Use
EWJ-2 Digital Grain Hardness Tester is suitable for scientific research and teaching in the agricultural industry. It is specially used to test the hardness of grain (wheat, rice, rice, etc.). It adopts advanced force measurement technology, which has high test accuracy and intuitive instrument indication Strong, high resolution, easy operation, durable and reliable. And the appearance is beautiful, you can carry out the handheld measurement at the acquisition site, or you can choose to test on the laboratory bench.
Second, the functional characteristics
1. Digital display, easy to read and high precision.
2, light weight, small size, easy to carry.
3. Unit display: Kg and N switch between each other.
4, the battery has short circuit, leakage, overload protection, the battery has a low battery reminder, using 3.7V lithium battery power, at the same time no operation for ten minutes will automatically shut down.
5, with two measurement modes: real-time, peak free switching.
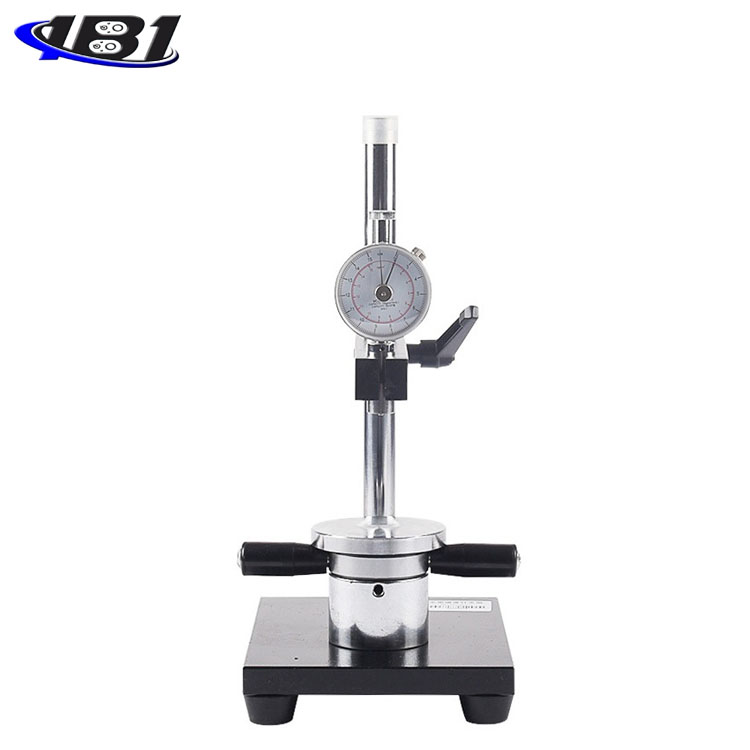
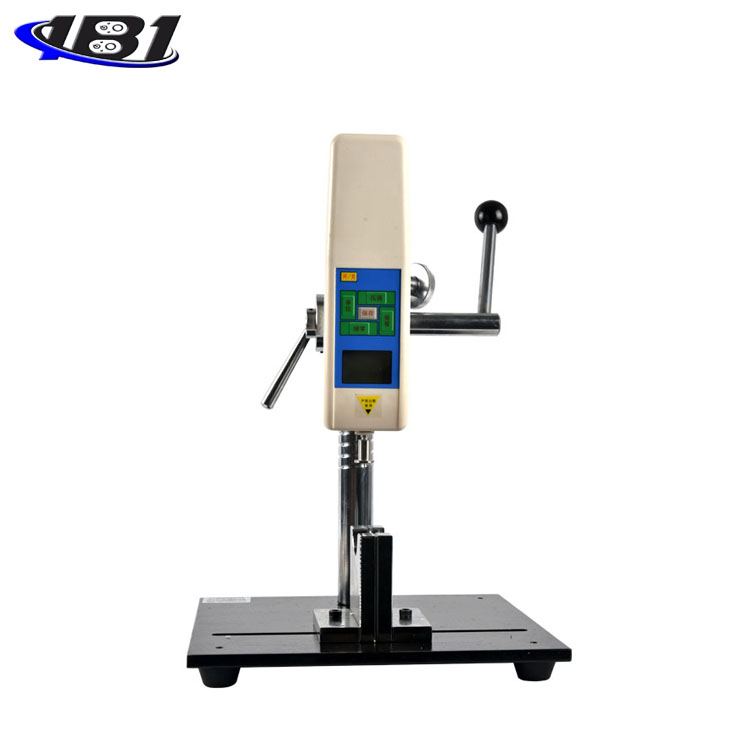
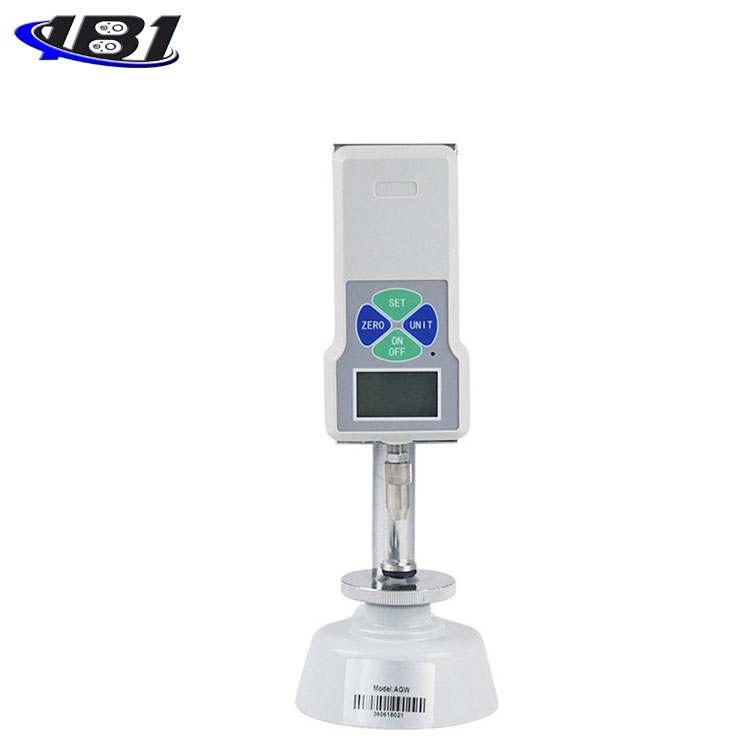
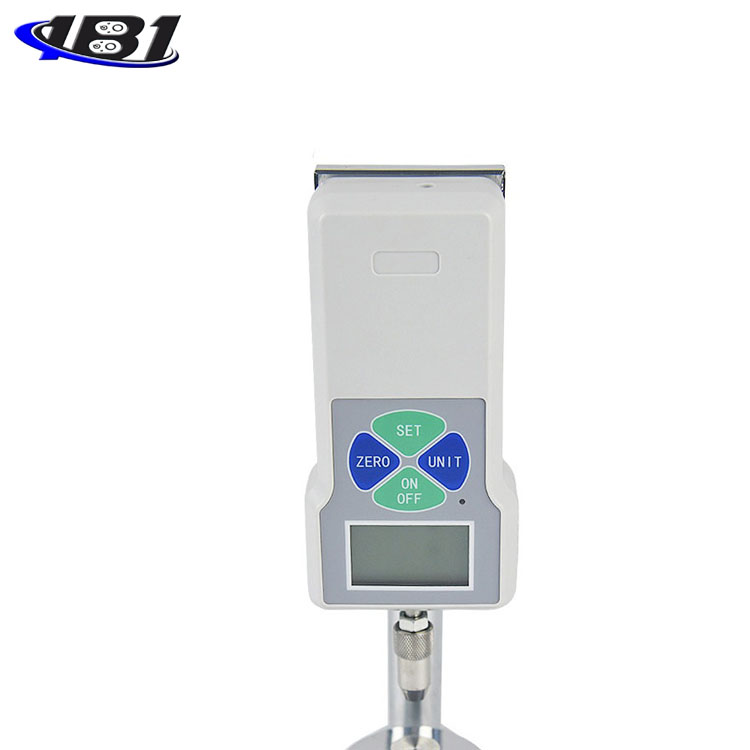
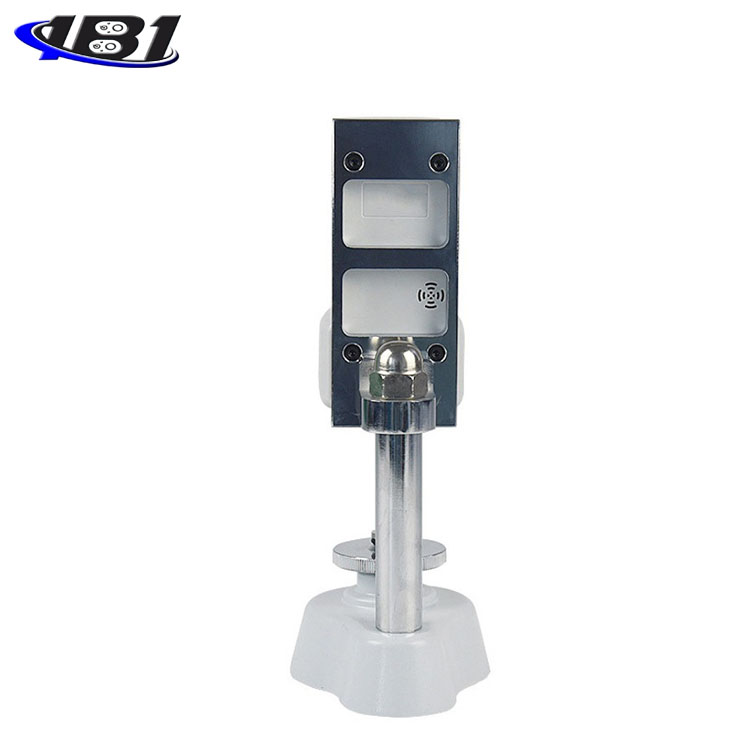
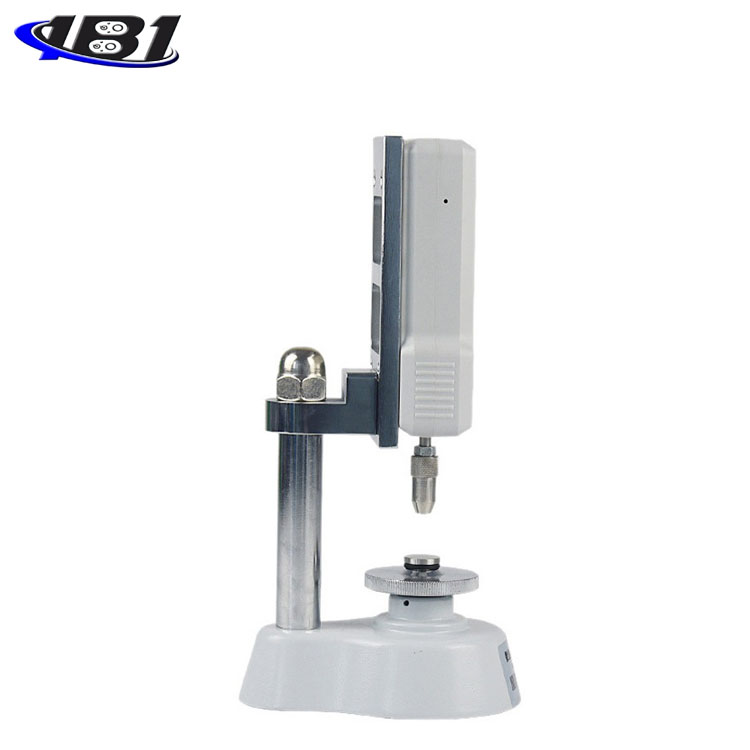
Third, the shape structure

Fourth, the specifications
|
Model specifications |
20Kg |
|
Maximum load value |
20kg |
|
196N |
|
|
Load division |
0.01kg |
|
0.1N |
|
|
Sensor structure |
Built-in |
|
Precision |
± 2% |
|
power supply |
3.7V lithium battery |
|
Charging time |
4 ~ 6 hours |
|
Battery continuous use time |
About 15 hours |
|
Battery Life |
≥300 times |
|
charger |
Input: AC 220V 50HZ Output: DC 5V 1000mA |
|
Operating temperature |
5 ℃ ~ 35 ℃ |
|
Transport temperature |
-10 ℃ ~ 60 ℃ |
|
Relative humidity |
15% ~ 80% RH |
|
working environment |
No vibration source and corrosive medium around |
Five, screen display
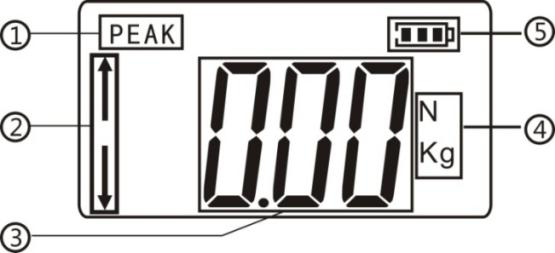
① Peak mode: After powering on, enter the measurement interface and press the\"\" SET\"key to enter the\" peak mode\"to record the maximum force value measured in a period.
② Force indication: The hardness tester does not move, the upper arrow shows tension, and the lower arrow shows thrust.
③ The measured hardness value is displayed.
④, two units display: kg (kg), N (ox) two units are displayed separately, press \"UNIT \" key to switch between each other.
⑤, battery display.
Six, key introduction
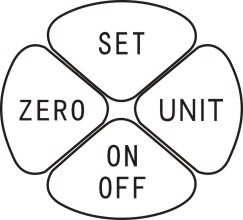
OFF / ON (\"On / Off \" key): When this key is pressed, the power is turned on and the measurement interface appears. When shutting down, press this key again to shut down.
ZERO (\"Zero \" key): When this key is pressed, the hardness value tested on the screen will be reset to zero.
SET (\"mode switch \" key): In the measurement interface, when you press this key, you enter the peak measurement mode. Long press the\"\" SET\"\" key for 5-6 seconds to enter the setting interface.
UNIT (\"Unit switch \" key): When you press this key, you can switch between two different units. Long press the\"\" UNIT \"key for 5-6 seconds to flip the value displayed on the screen.
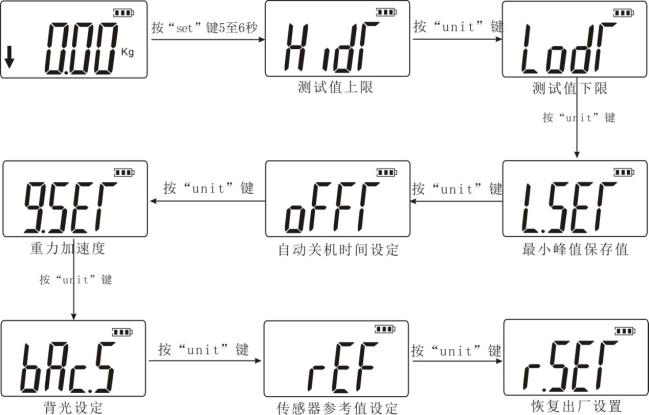
Seven, boot display

Function introduction
a. Setting items:
In the measurement interface, press and hold the\"\" SET\"\" key for 5 to 6 seconds, then release it to enter the setting interface, display\"\" HIDT \", and then press \" UNIT \"continuously, and other setting items will appear in turn: \"LODT \", \"L.SET \", \"OFFT \", \"G.SET \", \"BAC.S \", \"REF \", \"R.SET \", As shown below:
 (HIDT) Test value upper limit setting: Set the upper limit of the test value. The upper limit value defaults to 100% of the full scale. Above the upper limit is out of range and the instrument will beep. If you want to reset the upper limit, you can use the\"\" UNIT\"\" key and the\"\" ZERO \"key to set it. Press \"SET \" key to save and return to the setting item interface automatically. As shown below:
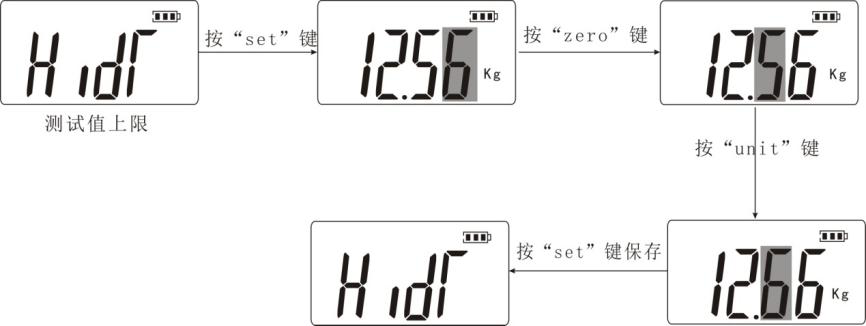
 (LODT) Test value lower limit setting: Set the lower limit of the test value. The lower limit defaults to 0. Below the lower limit is out of range and the instrument will beep. If you want to reset the lower limit, it is similar to the previous step. Use the\"\" UNIT\"\" and\"\" ZERO \"keys to set. Press \"SET \" key to save and return to the setting item interface automatically.
 (L.SET) Peak minimum saved value: The minimum peak saved value. In the peak mode, when the current value is less than this value, the peak value will not be saved.
 (OFFT) Automatic shutdown time setting: Under this setting item, use the\"\" UNIT\"\" key and the\"\" ZERO \"key to set, you can set the automatic shutdown from 1 minute to 9999 minutes, or \" 00 \"Does not shut down automatically. If you choose not to shut down automatically, press \"SET \" key to finish the setting. You are returned to the options screen. The instrument is set to 10 minutes by default.
 (G.SET) Gravity acceleration setting: The user can set the gravity acceleration value according to the location of the area. The default value is 9.800.
 (BAC.S) Backlight function setting: Under this setting item, use \"UNIT \" key to select, if you choose \"
 (YES) \"means turn on the backlight function, select \"
 (NO) \"means to turn off the backlight. After selecting, press the\"\"SET\" key to save and return to the setting item interface.
 (rEF) sensor reference value setting: This option does not need to be set by the user.
 (R.SET) Restore factory settings function: Under this setting item, press \"SET \" key to restore the factory settings and the instrument shuts down. If you use the instrument to restart.
How to use
1. Press the \"On \" key to turn on the instrument. After entering the measurement interface, select the real-time or peak measurement mode as required.
2. When testing small grains, use the camera to fix the grains (preferably to place them vertically), and then turn the handwheel to slowly move the jack up and press. suddenly
The displayed value is the maximum hardness value.
3. When retesting is required, first remove the measured residue from the last measurement, then press \"ZERO \" on the instrument
Press the key to clear the value. Then rotate the handwheel to raise the ejector rod to a proper height so as to place the measured grains again. Repeat step 2 to complete the retest.
4. After the test is completed, clean up the grain residues, turn off the power of the instrument, remove the jigs, clean the objects and put them back in the tool box for the next use.
Ten, safety precautions
1. Matters needing attention:
a. After purchasing this instrument, if the instrument has insufficient power, it needs to be charged for 4 ~ 6 hours before it can be used normally.
b. If the operation is incorrect, it may damage the instrument or cause serious accidents. This manual points out important matters for preventing accidents and how to use the instrument. Please read this manual carefully before use, and keep it in a safe place for future reading.
2. Warnings:
a. Do not use a fixture that is damaged or severely deformed.
b. Do not use the instrument beyond its maximum range. Doing so may cause damage to the sensor or even an accident.
c. When the test value exceeds 100% of full scale, the buzzer will beep continuously. At this time, please quickly remove the added load or reduce the load. When the test value exceeds 120% of full scale, the instrument may be damaged.
3. Solve the crash state: When the instrument crashes unexpectedly, press a small round rod on the right side of the instrument with a button labeled\"\" Reset\"\" to quickly reset and shut down.
4. Safety matters:
a. Please use the matching charger to charge, otherwise it will cause circuit failure or even fire.
b. Do not use a power source other than the rated voltage of the charger, otherwise it may cause electric shock or fire.
c. Do not pull out or plug in the power supply with wet hands, otherwise it may cause electric shock.
d. Do not pull the power cord of the charger to pull out the plug, so as to avoid the electric wire being torn and being shocked.
e. Please use a soft cloth to clean the machine. Immerse the cloth in water soaked in detergent and wring it dry before removing dust and dirt. Note: Do not use volatile chemicals to clean the unit (such as volatile agents, thinners, alcohol, etc.).
f. Do not operate the machine in the following environments
① A humid environment ② A dusty environment ③ A place where oil or chemicals are used ④ A place with a vibration source around
g. Please use and store within the specified temperature and humidity range, otherwise it may cause the instrument to malfunction.
h. Do not disassemble, repair or modify the machine yourself. These actions may cause permanent failure of the instrument.
i. Other outstanding matters needing attention in safety production.
J. Confirmation items before sending the instrument for repair
|
power supply |
symptom |
Cause or phenomenon |
Dispose |
|
Press \"Startup \" key no display |
Battery is dead |
Recharge |
|
|
test value |
Test value is not accurate |
Excessive error |
Need to return to factory for correction |
|
other |
Unexpected crash |
No response when pressing any key |
Press the \"Reset \" key with the needle |
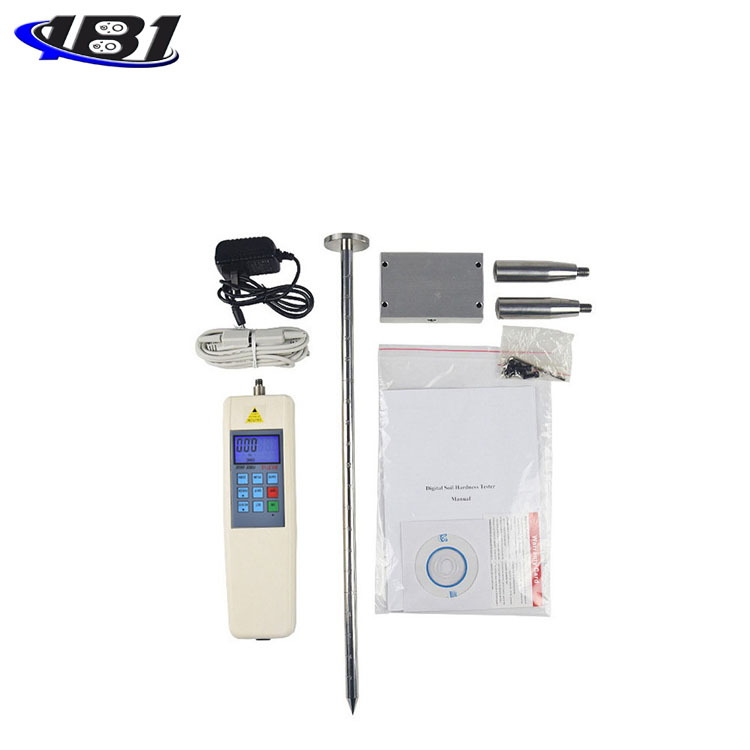
Eleven, packing list
Dear Customer:
Hello! Thank you very much for choosing our company's grain hardness tester. When you purchase, please check whether the accessories are complete.
|
Host |
1 set |
|
Charger (5V, small head) |
1 |
|
Manual |
1 serving |
|
Certificate of conformity |
1 piece |
|
Inspection certificate |
1 serving |
|
Desiccant |
1 serving |
|
Hex nut (M6) |
1 |
|
Height adjustment table A / B |
1 each |