support hotline
0577-57572522

I. Overview
1.1 Main uses and scope of application
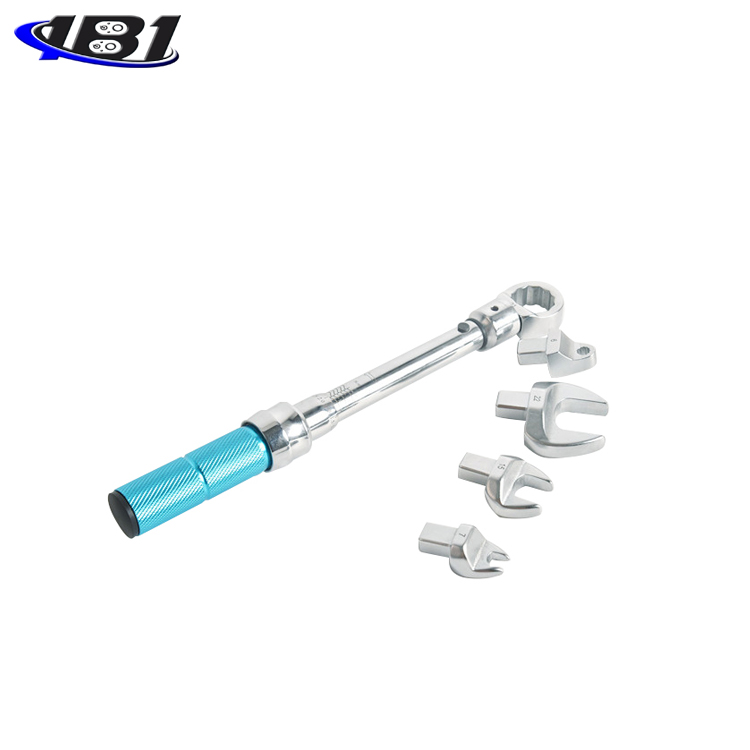
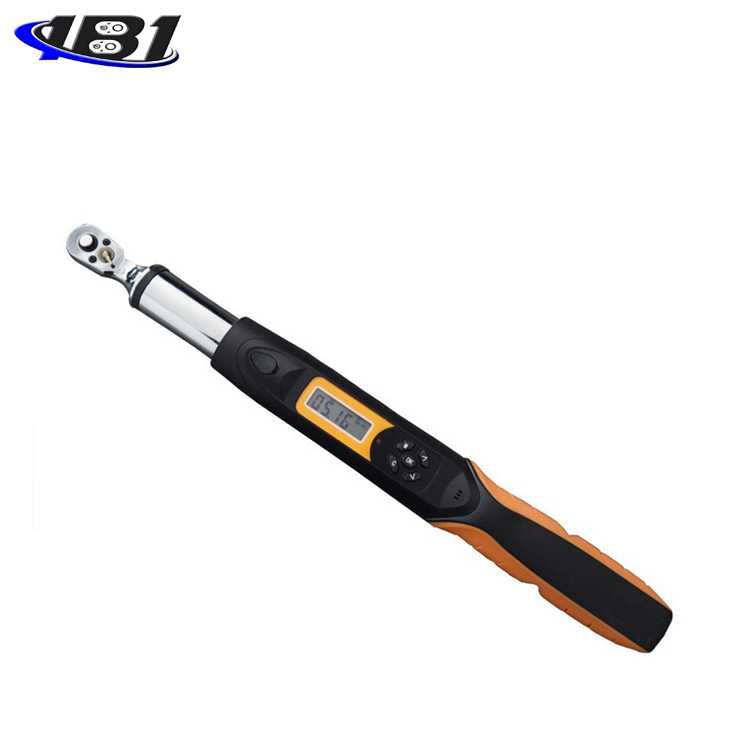
Digital torque wrench is different from ordinary torque wrench, with powerful operation functions, including torque setting; unit setting; mode setting; numerical storage; numerical clear; numerical output and user correction function. Easy to operate and reduces operator requirements by installing a digital display. Suitable for bolt fastening and control in automobile industry, machinery industry, etc.
1.2 Features
1.2.1 Digital display torque reading
1.2.2 ± 2% clockwise, ± 2.5% counterclockwise (20 ~ 100% of the maximum operating range)
1.2.3 Can be operated clockwise and counterclockwise
1.2.4 Peak Hold and Real-Time Mode
1.2.5 Buzzer and LED indication (when the predetermined torque value is reached)
1.2.6 Four engineering units (ft.lb, in.lb, N.m, kgf.cm)
1.2.7 100 storable record values
1.2.8 Communication function
1.2.9 5 minutes automatic shutdown
1.3 Product Model Selection
model:

①: Highest accuracy
|
Accuracy |
|
± 2% -clockwise / ± 2.5% -counterclockwise |
②: Whether with communication function
|
Communication transmission function |
|
|
无 |
无 |
|
R |
有 |
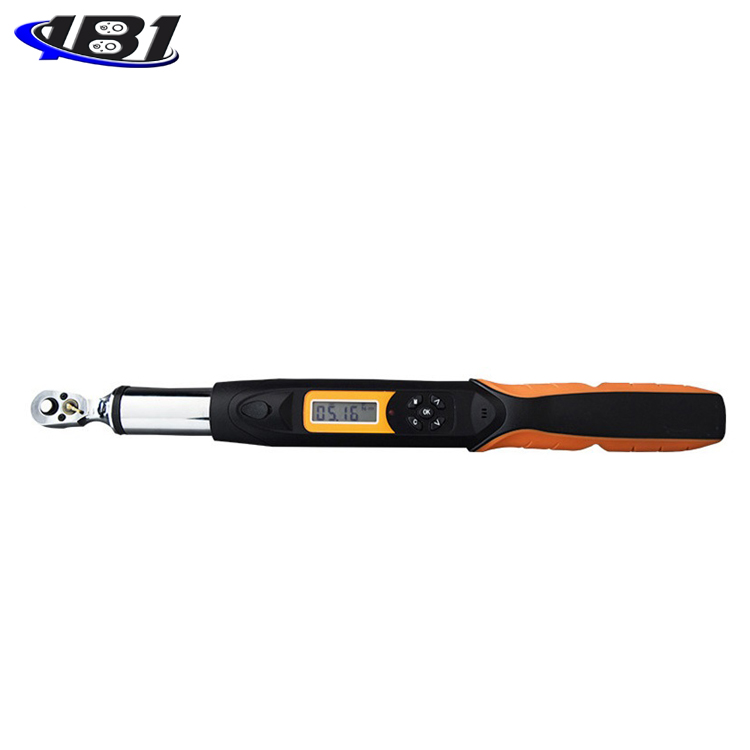
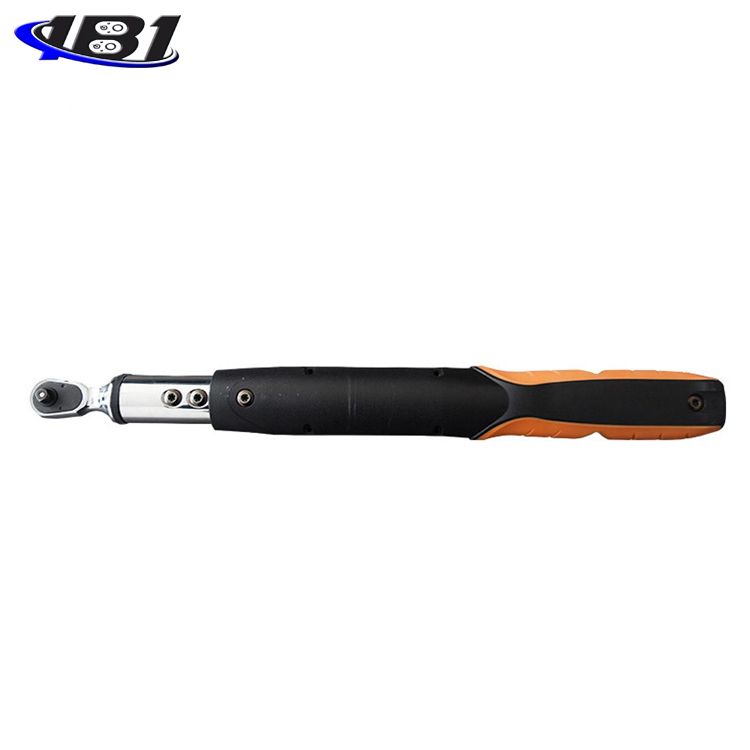
Function and name of each component


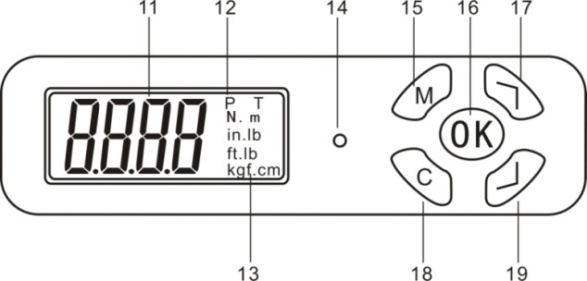
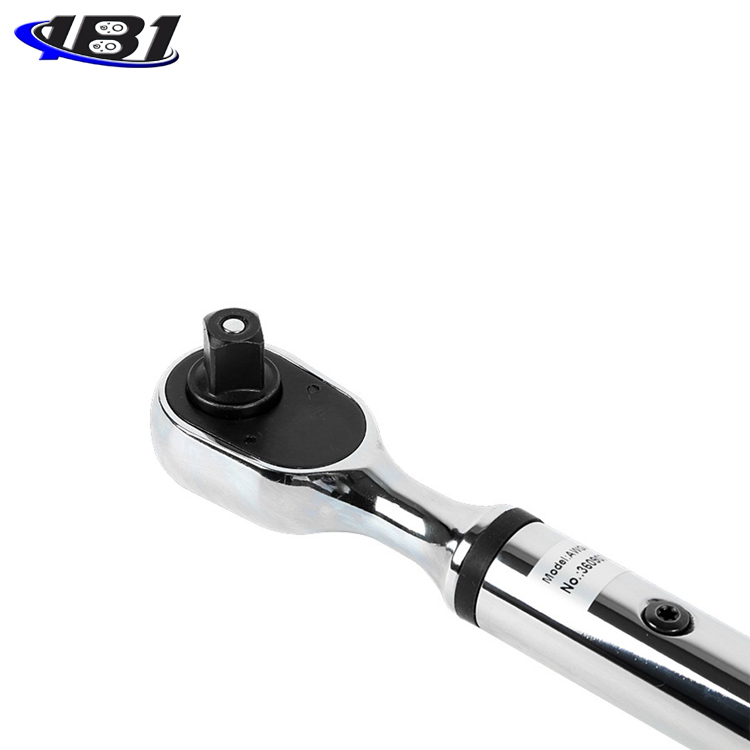
1.Bidirectional ratchet head11.Torque value
2. Steering paddle 12, P (peak mode), T (real-time mode)
3. Communication hole 13. Unit (N.m, in.lb, ft.lb, kgf.cm)
4.LCD screen 14.LED indicator
5, button 15, menu button
6.Buzzer 16.OK button
7.Battery box 17.Up button
8.Battery cover 18.Cancel button
9, ratchet torque square head 19, down button
10.Grip
Product technical specifications
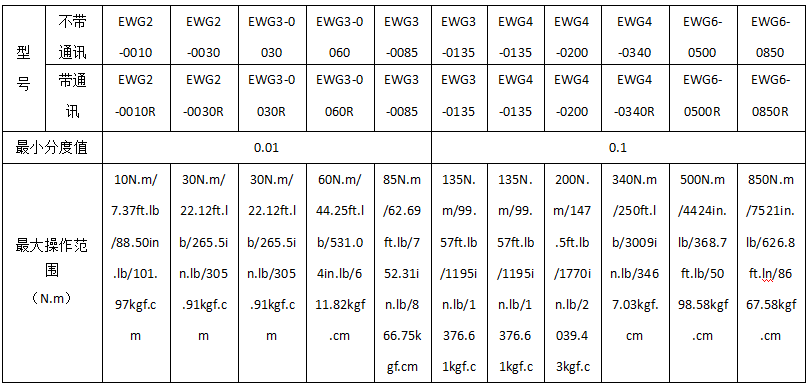
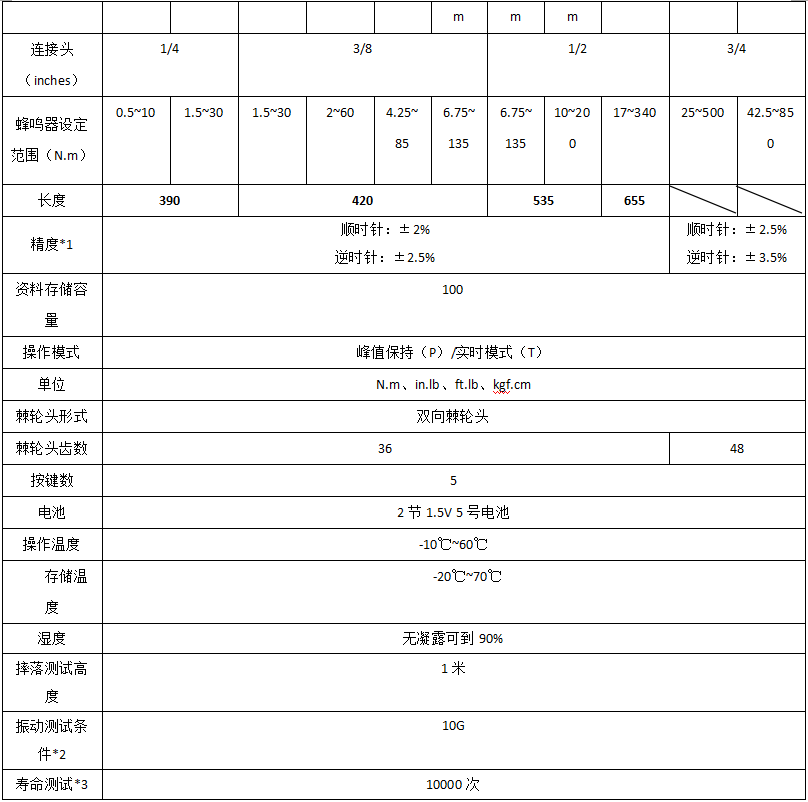
*: See comments at the end of the form
note:
* 1. The accuracy guarantee range is from 20% to 100% of the maximum operating value, and the last digit is ± 1. Torque accuracy is a normal value. The calibration accuracy is based on the middle groove of the five grooves on the grip. To ensure accuracy, it is recommended to calibrate once a year.
* 2. Life test includes horizontal test and vertical test.
* 3. \"One time \" means apply the wrench from 0N.m to the maximum operating setting value of the wrench, and then return to 0N.m.
Four, precautions before using a wrench
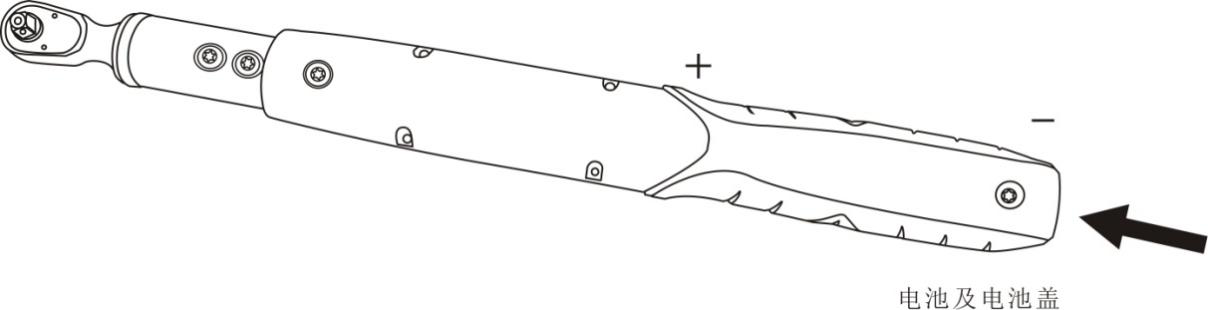
4.1 Insert the battery
4.1.1. Remove the battery cover.
4.1.2. Insert two AA batteries into the battery box, please pay attention to the positive and negative directions.
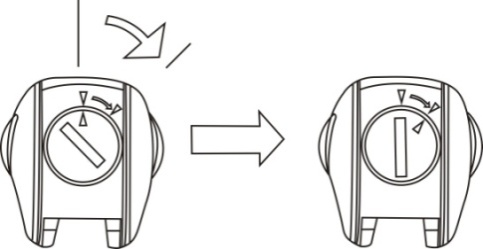
4.1.3. Replace the battery cover and rotate the battery cover to the position shown below and below.
4.2. Power on and reset
4.2.1, press \"C \" key to turn on the wrench power
4.2.2. After the power is turned on, before using it, press the\"C\" key to reset the wrench

note:
1. If an external force has been applied to the wrench before the power is turned on, an offset value will be displayed on the screen after the power is turned on / reset.
2. \"N.m \" and \"T \" are loaded from EEPROM. Once the user changes the unit or mode, the EEPROM will always exist.
4.3 Wake up the wrench during sleep
4.3.1 The wrench is to save power, if there is no operation. It will enter sleep mode after about 5 minutes. Press \"C \" key to wake up the wrench
4.4 Low voltage protection
4.4.1. If the system detects that the battery voltage is below 2.2V, the wrench will cut off the power; when the wrench voltage is below 2.2V, the wrench will automatically shut down.
Five, settings
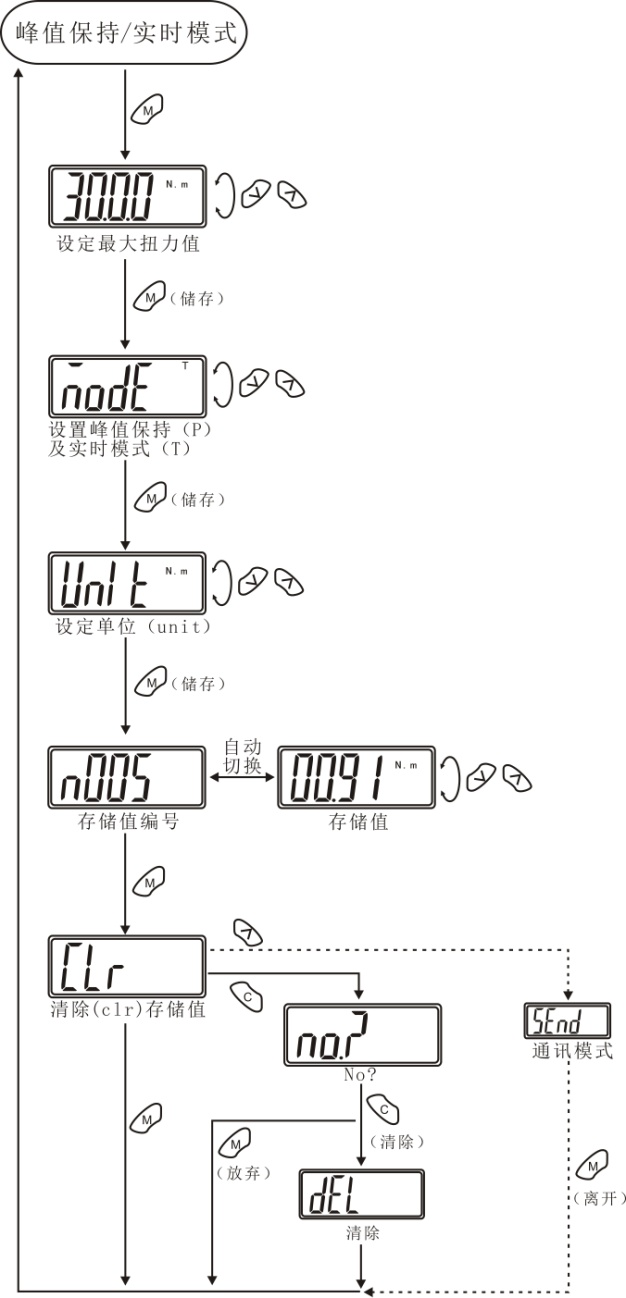
note:
1. If there is no data in the memory, the screen displays \"n000 \", and then automatically switches to the stored value \"0000 \".
2. The communication mode is used to upload records to the computer.
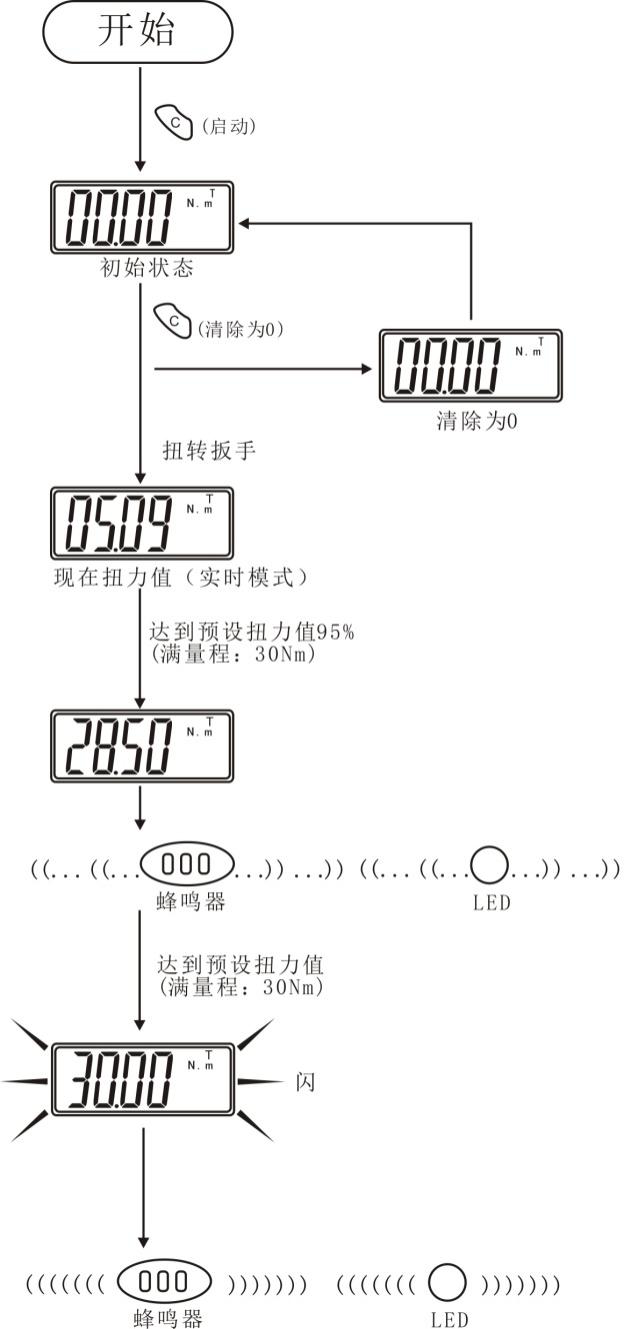
Six, real-time mode
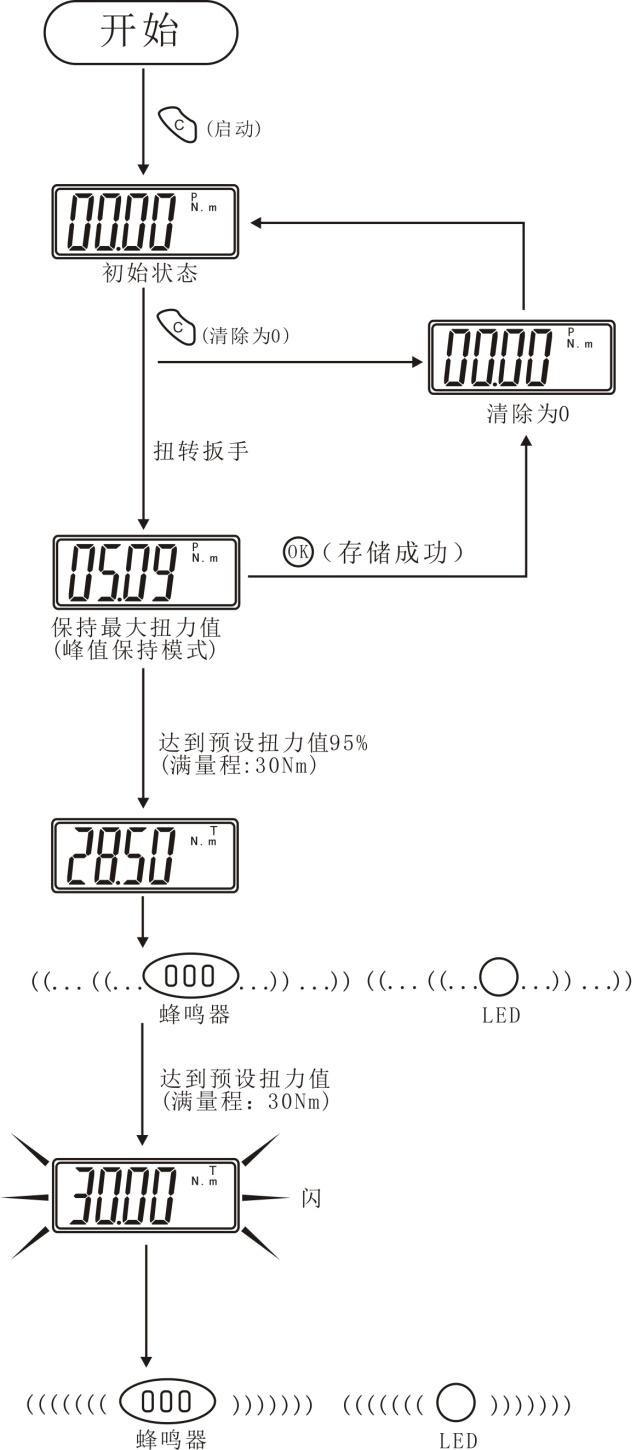
Seven, peak hold mode
Communication function
8.1, connecting communication lines
8.1.1. After turning off the power of the wrench, use the attached communication cable to connect the computer communication hole and the wrench.
8.2 Uploading stored values
8.2.1. Make sure the PC and wrench are connected.
8.2.2. Press the wrench to the operation mode \". (Refer to chapter\" Settings\")
8.2.3. Start the upload software on the PC.
8.2.4. Before uploading the software, first select the correct Com No and click \"Port Open \" to open the port.
8.2.5. Next, click the upload button to transfer the stored value to the computer.
8.2.6 Finally, click \"Export \", the system will automatically open the uploaded data in Excel format.
8.2.7. Select the appropriate storage path to save the data form you uploaded.
Nine, maintenance and storage
9.1, note:
To maintain good accuracy, it is recommended to recalibrate about every year.
9.2 Over-torque may cause damage or loss of accuracy (beyond the maximum torque range of 105%).
9.3. Do not shake the wrench violently or drop the wrench on the ground.
9.4 Do not use the wrench as a hammer.
9.5. Do not place the wrench in a place with high temperature, high humidity or direct sunlight.
9.6. Do not use a wrench near water.
9.7 If you accidentally wet the wrench, wipe it with a dry towel immediately. Salt in seawater can damage the wrench.
9.8. Do not use organic solvents to clean the wrench, such as alcohol or paint thinner.
9.9. Do not place the wrench near magnetic objects.
9.10. Do not place the wrench in a place with a lot of dust or sand. This will cause serious damage to the wrench.
9.11. Do not press on the LCD screen.
X. Battery disposal
10.1. If the torque wrench is not used for a long time, please remove the battery.
10.2 When you need to travel long distances or in cold areas, please prepare a spare battery.
10.3 Do not mix batteries of different brands, and do not mix new and old batteries.
10.4. Sweat, oil, etc. will hinder the contact of the battery electrodes. Please wipe the battery clean before inserting a torque wrench.
10.5. Dispose of used batteries in the designated recycling place. Do not place the battery in a fire.
Eleven, detailed list of attachments
|
1 |
Digital torque wrench |
1 |
|
2 |
Manual |
1 serving |
|
3 |
Battery cover key |
1 |
|
4 |
Certificate of conformity |
1 serving |
|
5 |
Warranty Card |
1 serving |
|
6 |
Inspection certificate |
1 serving |
|
7 |
Desiccant |
1 package |
|
8 |
5 # battery |
2 knots |