support hotline
0577-57572522
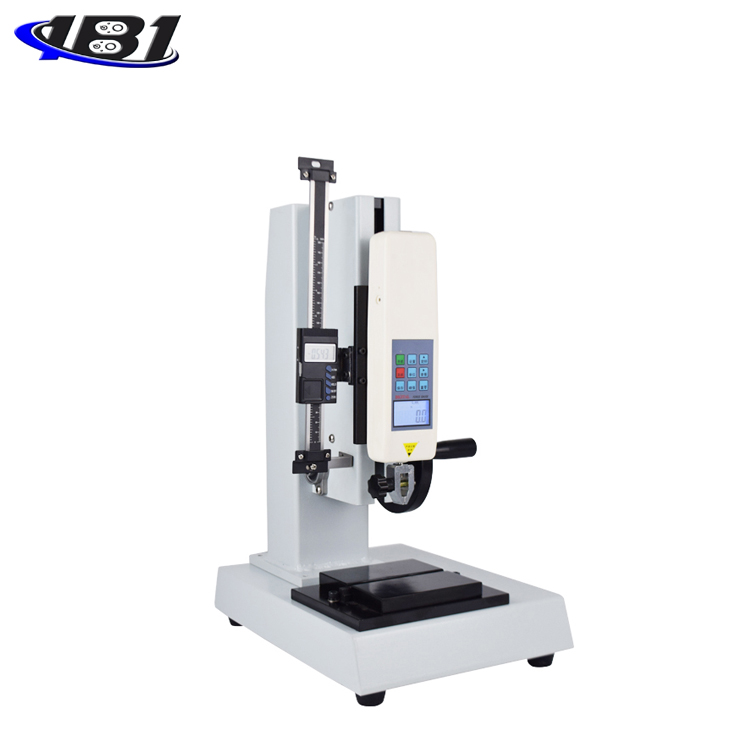
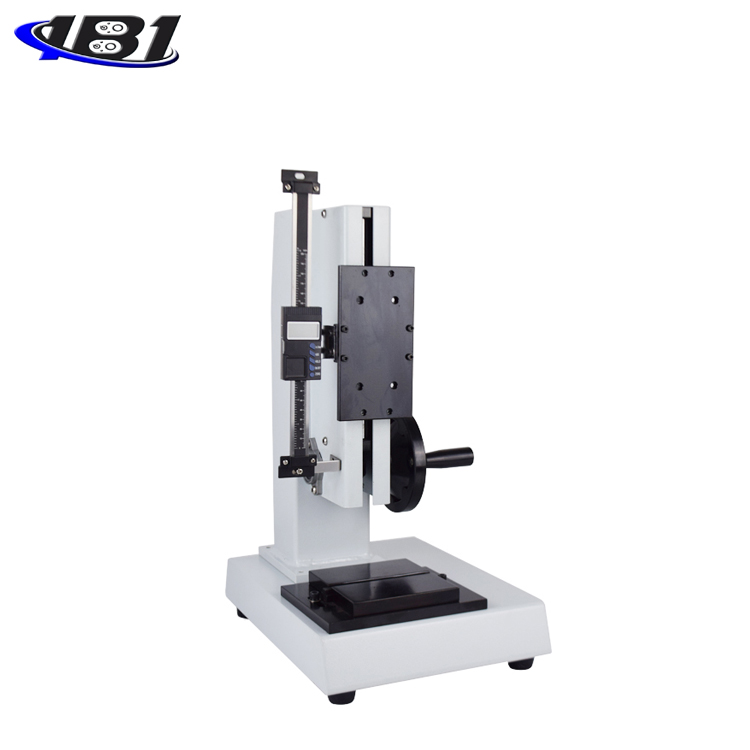
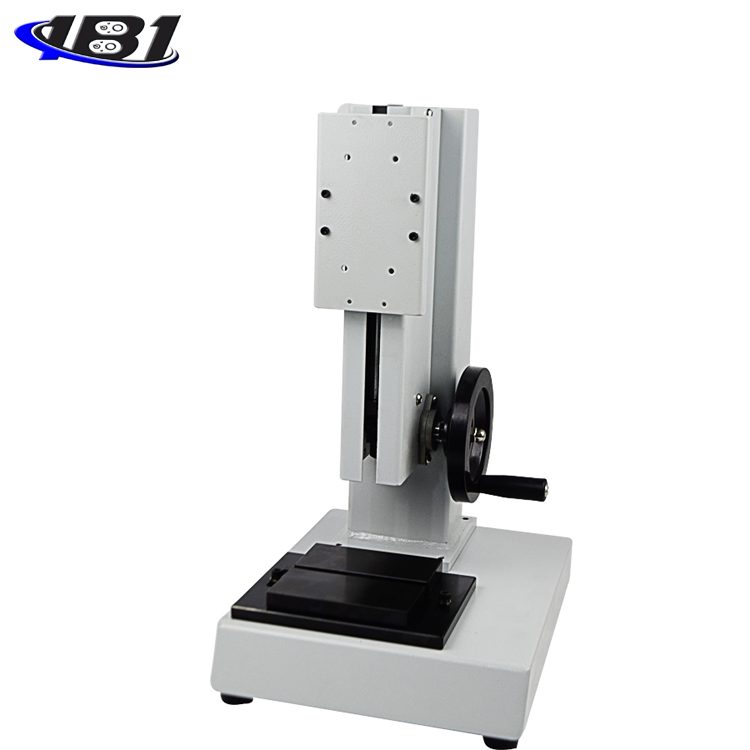
Product Overview:
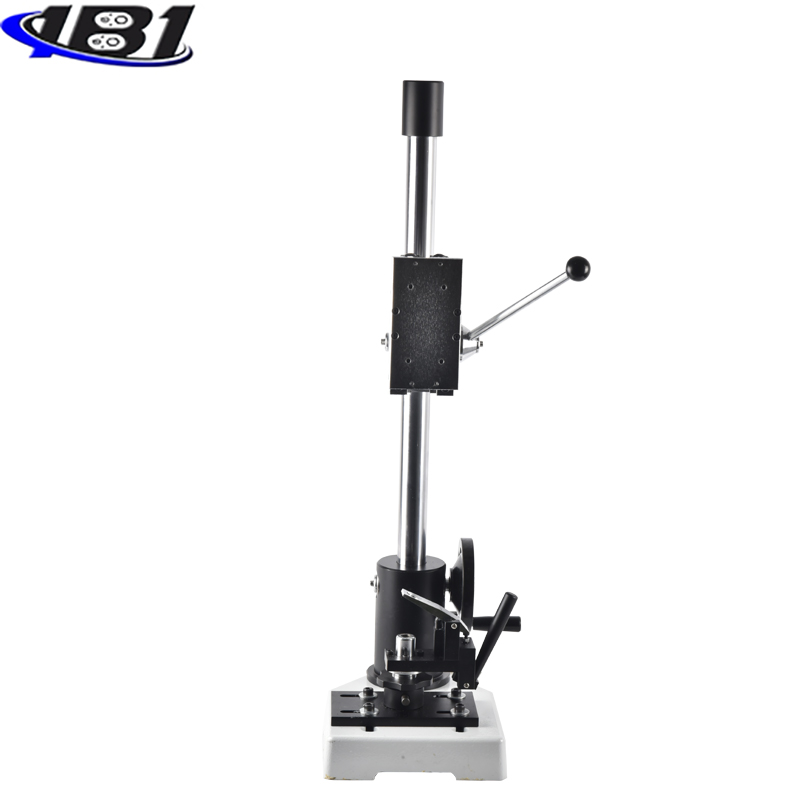
The ESC manual vertical side shake test bench is specially equipped for the HF series and Nk series push-pull force gauges, which can be combined into test machines for different purposes, and is suitable for various insertion and withdrawal forces, pressing forces, and damage tests. While displaying the force value, you can also install a digital scale to display the displacement, and perform a comparison test on the same displacement for different workpieces.
Features:
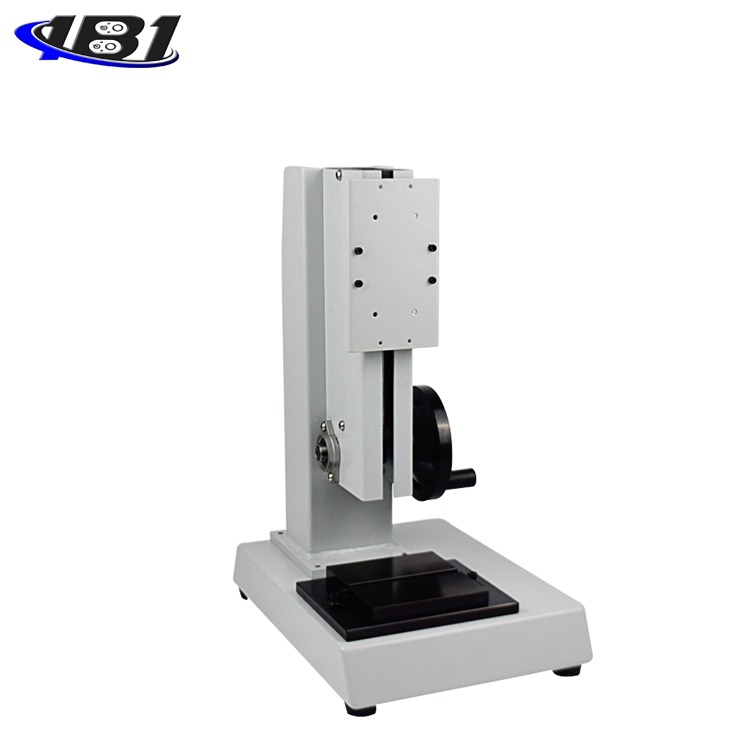
· The machine base has great stability and is suitable for indoor table testing.
· Screw drive, accurate probe displacement, side handwheel loading, simple and stable operation;
· The standard mobile platform of the base can move left and right and back and forth for convenient and accurate clamping;
· The machine can be installed on the table (table) and used to make the rack more stable;
· Equipped with a digital display scale, which can collect stroke data (ESC-S) at any time.
Product parameters:
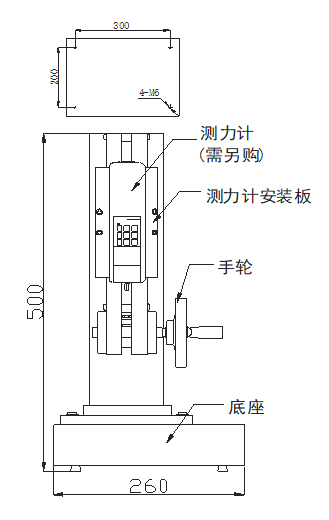
※ Length × Width × Height: 260mm × 360mm × 500mm
※ Stroke: 180mm
※ Rated load: 500N
※ Weight: 18kg
Installation method of machine and push-pull meter:
1. Machine installation method:
This machine can be installed on a table to make the machine more stable. Please ensure that the work surface is level during installation so that the test can obtain accurate values. Please refer to (right picture) for installation.
2. Installation method of push-pull force meter:
(1) Use an M4 wrench to loosen four M 4 × 15 hex socket head screws on the dynamometer mounting plate and remove the dynamometer mounting plate;
(2) Install the push-pull force timer of the HF series (digital push-pull force meter), and use the M4 hex wrench to pass the four M4 × 10 hex screws in the accessory bag through the 90 × 40 Screw the holes into the 4 M4 threaded holes of the dynamometer and install the dynamometer on the dynamometer mounting plate; or use a Phillips screwdriver to pass 4 M3 × 10 cross recessed pan head screws in the accessory bag through the measurement Inside the dynamometer, mount the dynamometer on the dynamometer mounting plate. The 145 × 30 holes on the mounting plate are screwed into the 4 M3 threaded holes of the dynamometer;
(3) Install the push-pull force timer of the NK series (pointer push-pull gauge), use a Phillips screwdriver to remove the four M × 10 screws on the back cover of the push-pull gauge, and remove the four M3 × 14 The Phillips screws pass through the 145 × 30 mounting holes on the dynamometer mounting plate and are screwed into the 4 M3 threaded holes on the dynamometer back cover (removal of the M3 × 10 screw threaded holes);
(4) After the push-pull gauge is installed, reinstall the dynamometer mounting plate on the rack with an M4 allen wrench.
According to the characteristics of the sample to be tested, the machine is installed or placed in a suitable position on the workbench. By rotating the hand wheel on the side of the test stand, the dynamometer can move up and down smoothly to complete the test.
V. Daily maintenance and maintenance:
1. Do not use it in overload. The rated load of this rack is 500N.
2. Pay attention to daily maintenance work and keep all parts of the machine clean.
3. When the machine is sluggish and inflexible during use, please add a little oil to the oil hole in the bearing seat on both sides of the machine. When the machine fails, please contact the manufacturer or the sales point in time (do not disassemble or repair without authorization).
Schematic: