support hotline
0577-57572522

I. Use
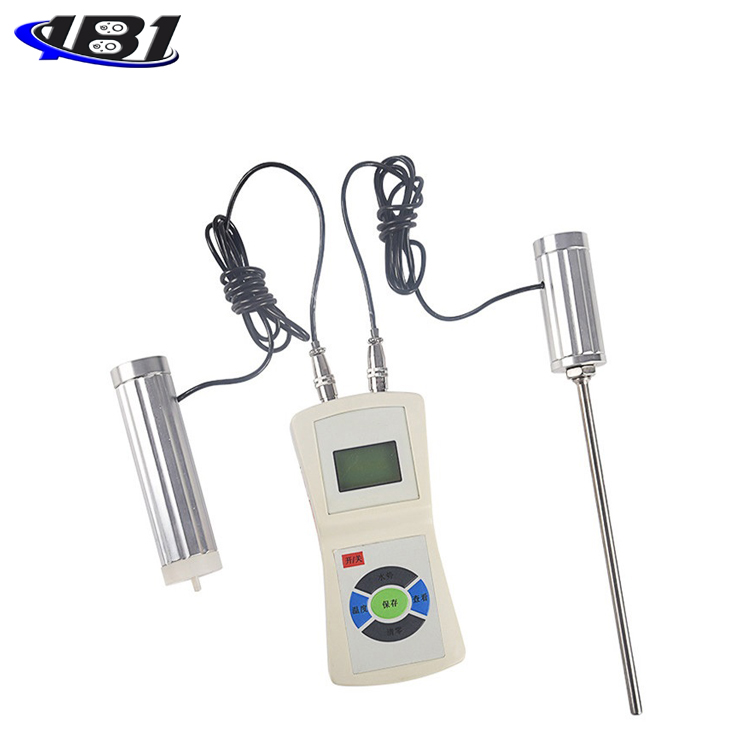
Digital plant lodging meter is a key factor in determining the lodging resistance of crops. Lodging of plants such as corn, sorghum, and tobacco has caused great difficulties in mechanical harvesting of crops. Cause a lot of waste. In addition, the lodging of crops leads to inadequate sunlight, which limits its production. The stems are measured in vivo at various stages of crop growth, and the population measurement data are statistically processed according to the correlation between the bending resistance and lodging resistance of the fiber layer of the stems, which is of great significance for crop cultivation and breeding.
Second, the functional characteristics
1. High precision and high resolution.
2. It is easy to operate, full-featured, and easy to carry.
3. Two measuring units of pressure (Kpa) and pressure (N) are available for selection and conversion.
4, with backlight function. (Without operating monitor keys, no backlight display after 10 seconds)
5, with green environmental protection, automatic shutdown function. (Without operating the monitor button, the monitor will automatically turn off after 10 minutes)
Third, the technical parameters
1. Model: EYD-1A, EYD-1B.
2. Maximum load: EYD-1A 50 N, EYD-1B 500 N.
3. Resolution: EYD-1A type 0.01 N, EYD-1B type 0.1N.
4. Measure stem thickness: 0 ~ 40mm.
5. Measurement accuracy: ± 0.5%.
6. Unit: Kpa, N.
7. Operating temperature: -10 ℃ ~ + 60 ℃;
8. Dimensions: length 295mm × width 130mm × thickness 36mm
9, Net weight: ~ 600g
Note: EYD-1A is dedicated to measuring wheat, rice, etc .; EYD-1B is dedicated to measuring corn, sugarcane, sorghum, etc.
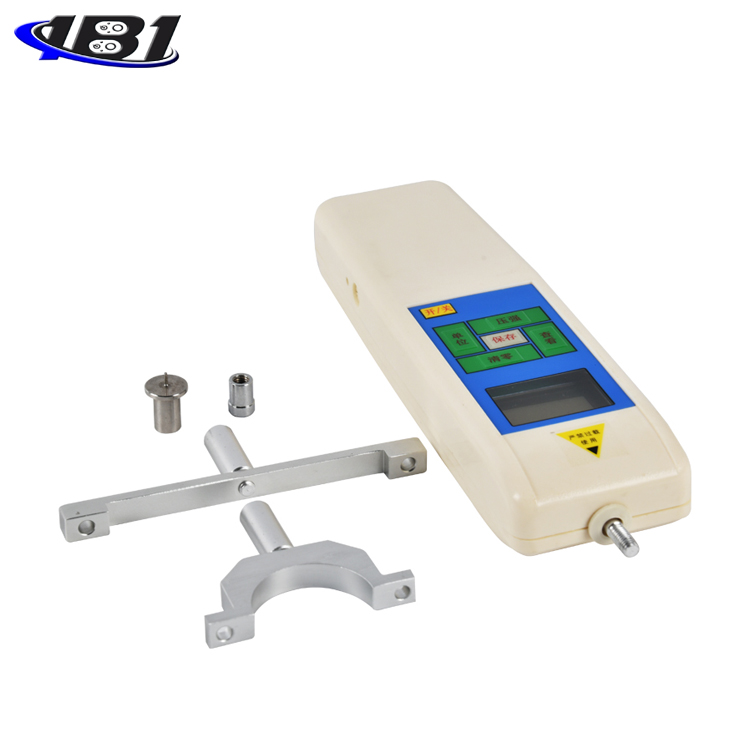
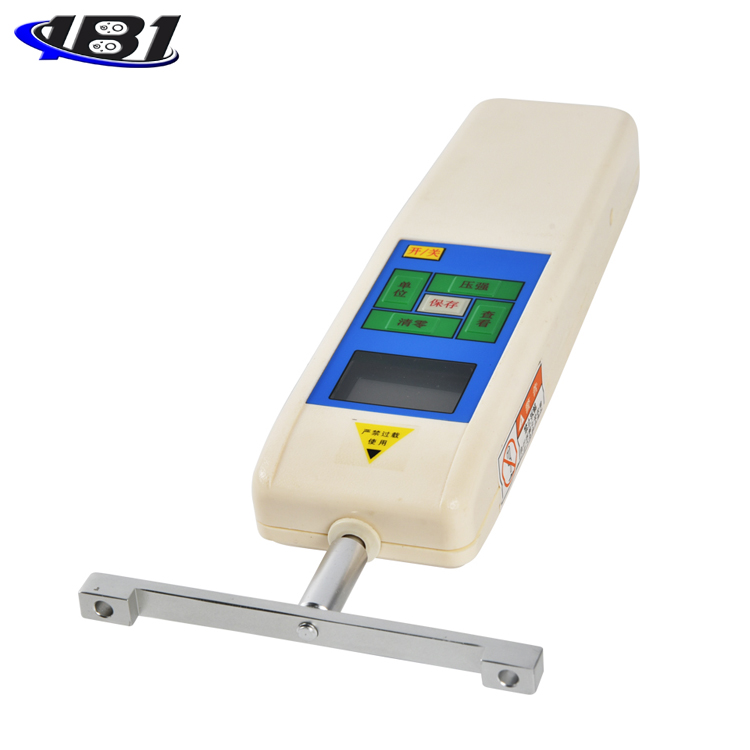
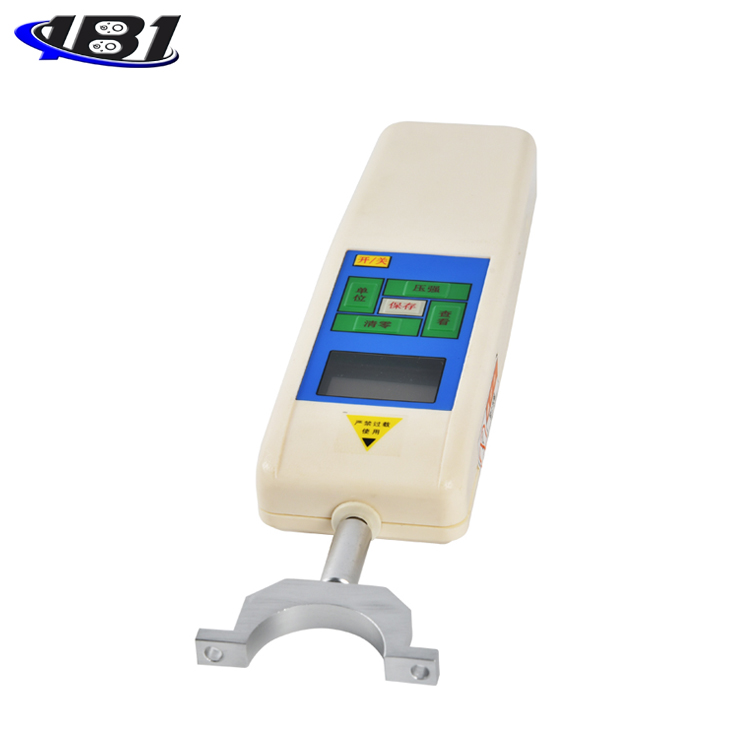
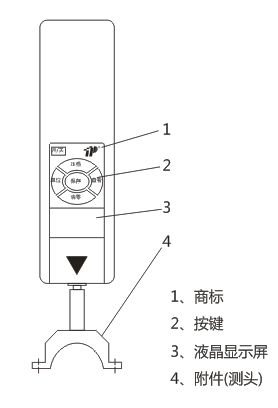
Product schematic diagram
Five, display panel
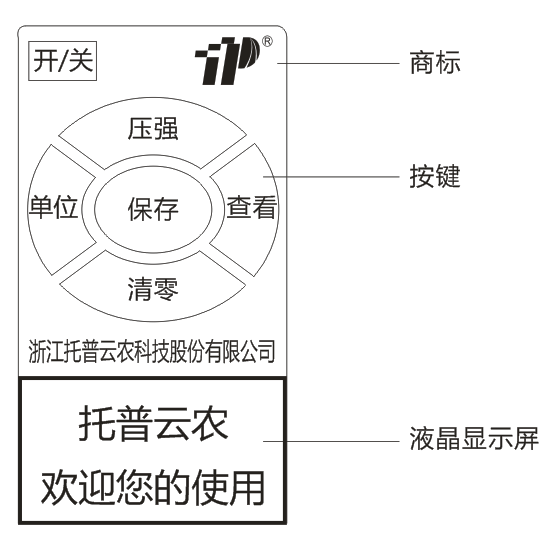
Six, key description
1. On / off key: can be used to turn on and off.
2. Unit key: It can be used to convert units, pressure (Kpa) and pressure (N).
3. Pressure key: Display the current measured pressure or pressure value.
4.Save key
a. Press this key in the measurement state to save the current measured pressure (including pressure), time, and storage number.
b. In the query state, press this key to view the next record.
c. Press this key in time adjustment state to save the currently set date period.
d. Press this key in the state of auto-save setting to save the current auto-save time.
5.Zero key
a. Press this key in the measurement state to clear the current measurement force value. The instrument should be reset for 3 seconds before the next measurement can be performed.
b. In the query state, press this key to clear the currently stored measurement force value.
c. Press and hold this key in the query status to delete all stored records.
d. Press this key in the system menu state to cycle through each menu in turn (including: time setting, auto save setting).
e. Press this key in the state of automatic save setting to set the time of automatic save (00 ~ 60 minutes). When it is set to 00, it means to close the automatic save function.
f. Press this key in time setting state to adjust the current time value.
6.Query key
a. Press this key in the measurement state to view the last record.
b. Press this key in the query status to view the previous record.
c. Press this key in the welcome interface to enter the system menu.
d. Press this key in the system menu state to enter the current menu item.
e. Press this key in the time setting state to set the year, month, day, hour and minute respectively.
User operation instructions
1. Startup display
Boot up to display manufacturer information and welcome to use:

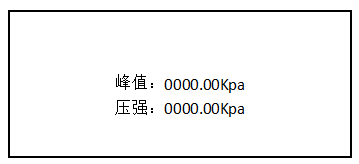
User main interface display
2.Use the system menu interface
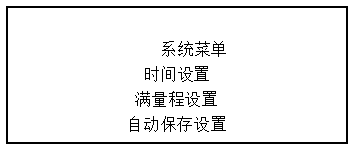
Press On / Key to display the welcome interface, press the query key once, the display is as follows:

Use the clear key to select the setting item. When the user's setting item is selected, press the query key to enter the parameter setting interface.
3.Parameter setting interface
In the user setting interface, press the query key to enter the parameter setting interface, which is displayed as follows:
a.Time setting

Use the clear key to select the setting item and the query key to modify the data. At this time, press the save key to confirm that the save was successful. (Time setting range: 00:00 on January 01, 2010 to 23:59 on December 31, 2030, the minimum time value is 1 minute)
★ b. Full scale setting: The user is not allowed to use this setting.
c. Automatically save settings
Use the query key to modify the data. At this time, press the save key to confirm that the save was successful. (Set the time for automatic saving (00 to 60 minutes). When it is set to 00, it means that the automatic saving function is turned off.)
Eight, test operation steps
1. Digital plant stem strength tester before use:
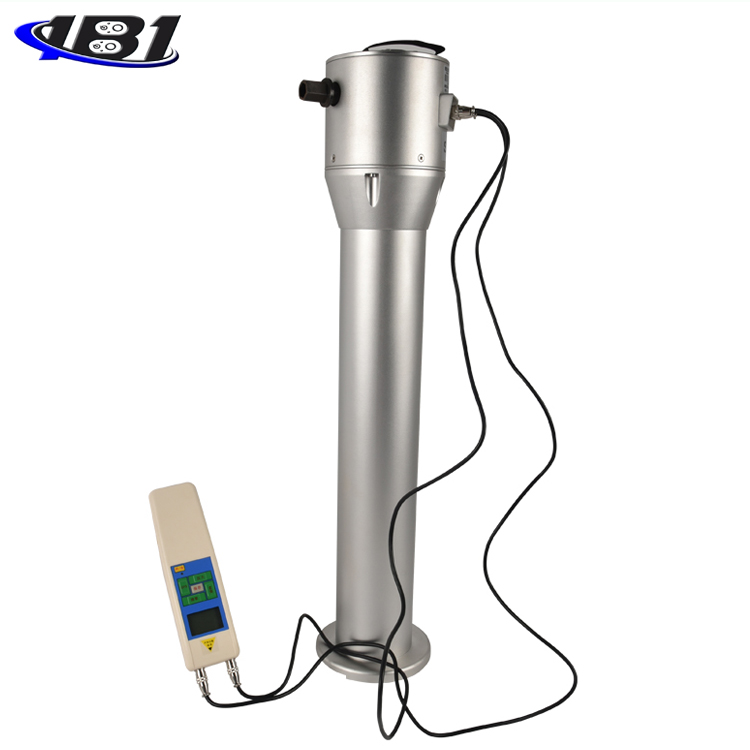
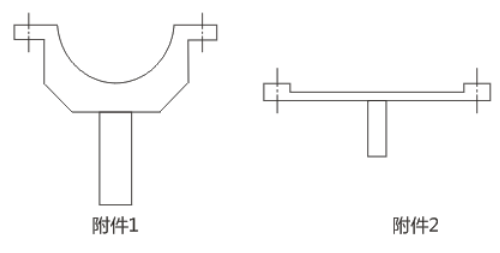
a. Select the appropriate attachment (Annex 1 is suitable for pushing down the upright crop stalk, and Annex 2 is suitable for pushing down the rice stripe crop). As shown below:
b. Connect the selected accessory (probe) to the host.
c. Press the power button to turn on the power.
2. Fix the stems with rubber bands and accessories, and place them at a height of 20cm from the ground. Pay attention to the direction of the rice ears when measuring, as shown in the figure below:
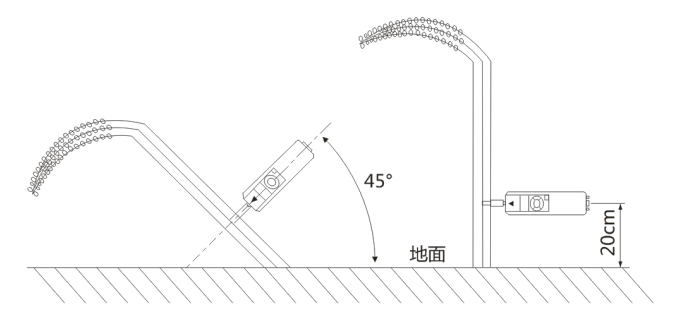
3. At this height, the stem pushes the crop at a right angle until the crop is at a 45-degree angle with the ground (the customer can extract the force value at the 45-degree angle or the force value at the time of breaking) as shown above As shown.
4. Record the pressure and note the number of stems.
Nine, matters needing attention, maintenance and repair
1. When there is no display when the power button is pressed, it means that the battery is dead and the battery needs to be replaced.
2. Do not tap the LCD screen and place objects on the LCD screen.
3. Do not press the function keys with nails, sharp objects or pointed objects.
4. Handle gently during use and handling.
5. Do not disassemble, repair or modify the machine yourself. These actions may cause permanent failure of the instrument.
6, please contact the original place of purchase or the company if a failure occurs.
7. Within one month from the date of sale of this product, product quality problems occur under normal use and no damage to the appearance. The customer should bring the original sales invoice, valid warranty card and complete packaging to the original place of purchase or the company will replace the same specifications Model products, the replacement products continue the warranty period and terms of the original product.
8. Within one year from the date of sale of this product, under normal use conditions, non-human faults are covered by the warranty (the user disassembles the machine or repairs at other service points by the company without warranty), and the customer has the original sales invoice and valid warranty Contact the purchase office for a free one-year warranty.
9. The warranty terms of this product are only applicable to this product sold in the Chinese market. For products that exceed the replacement period and warranty period, customers can inquire about maintenance issues at the original place of purchase or contact the company, and the company will provide paid maintenance.
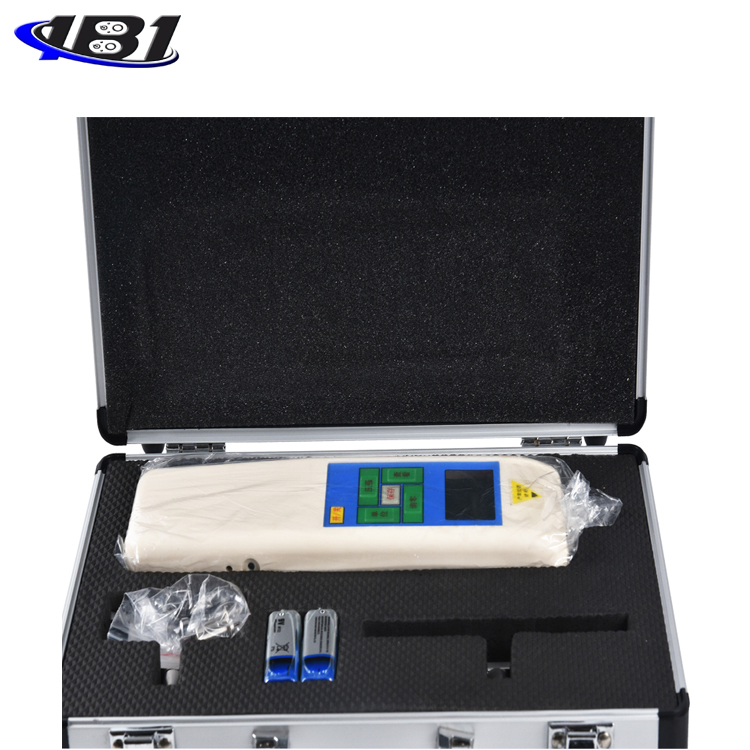
Ten, packing list
Dear Customer:
Hello! Thank you very much for choosing our company's digital display plant stem strength tester. When you purchase, please check whether the following accessories are complete.
|
Serial number |
Name |
Number |
|
1 |
Digital display |
1 set |
|
2 |
Side head 1 |
1 item |
|
3 |
Side 2 |
1 item |
|
4 |
battery |
2 |
|
5 |
user's manual |
1 serving |
|
6 |
Inspection certificate |
1 serving |
|
7 |
Certificate of conformity and warranty card |
1 piece |
|
8 |
Desiccant |
1 package |