support hotline
0577-57572522
I. Use
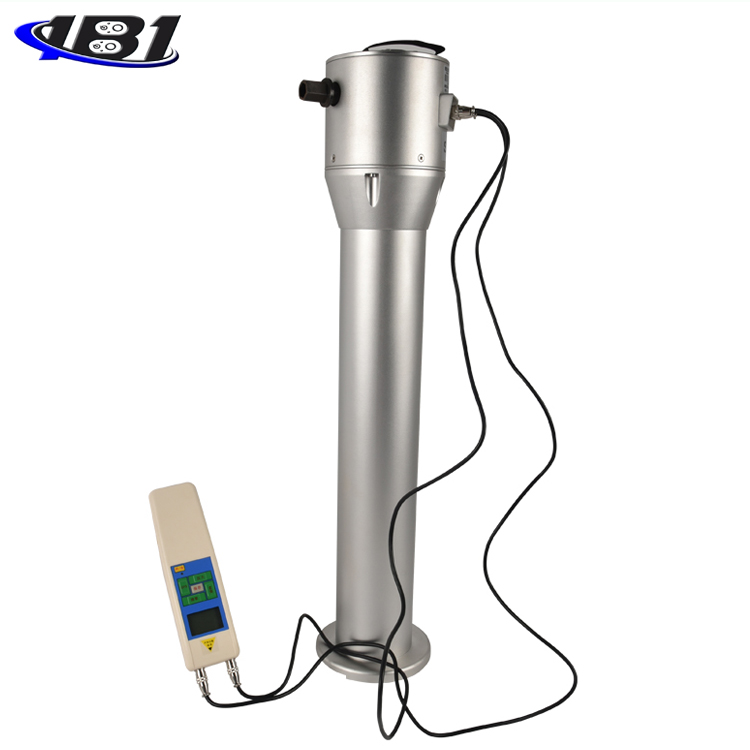
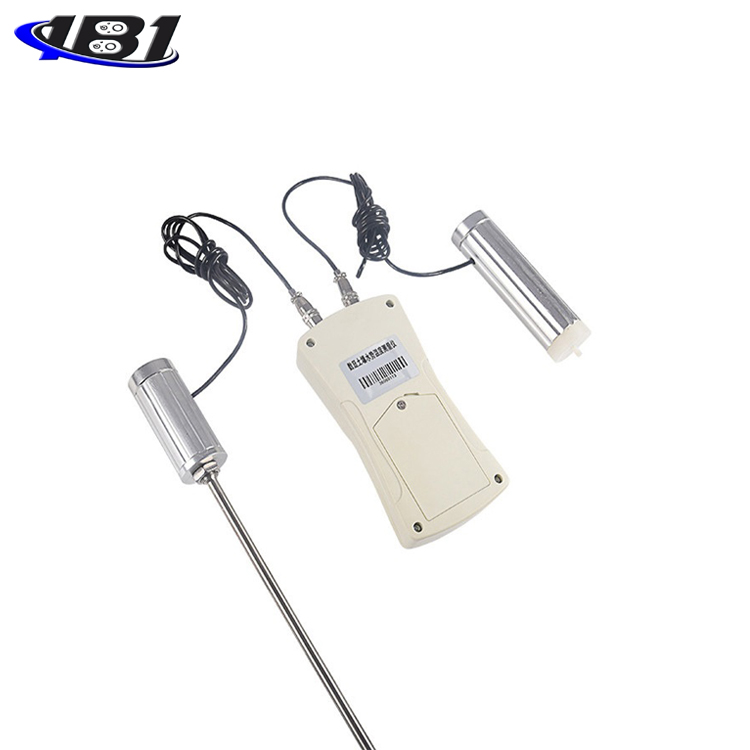
ERS-Ⅱ digital soil water potential temperature measuring instrument can locate and detect soil water potential in the field, so that it can further obtain soil water properties such as soil moisture and water conductivity
parameter. The instrument uses the tensiometer principle and combines one or more probes to improve the traditional technology. It is also possible to purchase only one set of instruments and multiple probes. can
The probe is buried for a long time at different depths in the ground and in different plots. In this way, if you want to know the water potential at a certain point, you can connect the instrument to the probe to read the value.
Second, the functional characteristics
1. High precision and high resolution.
2. It is easy to operate, full-featured, and easy to carry.
3. It has the function of automatically capturing the peak value of soil water potential.
4, with backlight function. (Without operating the display button, 10 seconds
No backlight display after clock)
5, with automatic shutdown function. (Without operating display keys, 10
The display turns off automatically after a few minutes)
Third, the technical parameters
1. Model: ERS-Ⅱ.
2. Maximum load: 100Kpa.
3. Resolution: 0.01 Kpa;
4. Accuracy: ± 1%;
5. Temperature measurement range: -55 ~ + 150 ℃.
6. Temperature accuracy: ± 0.5.
7. Operating environment temperature: 0 ~ + 50 ℃;
8. Number of standard configuration probes: 3.
Note: Users can purchase different numbers of probes according to their requirements.
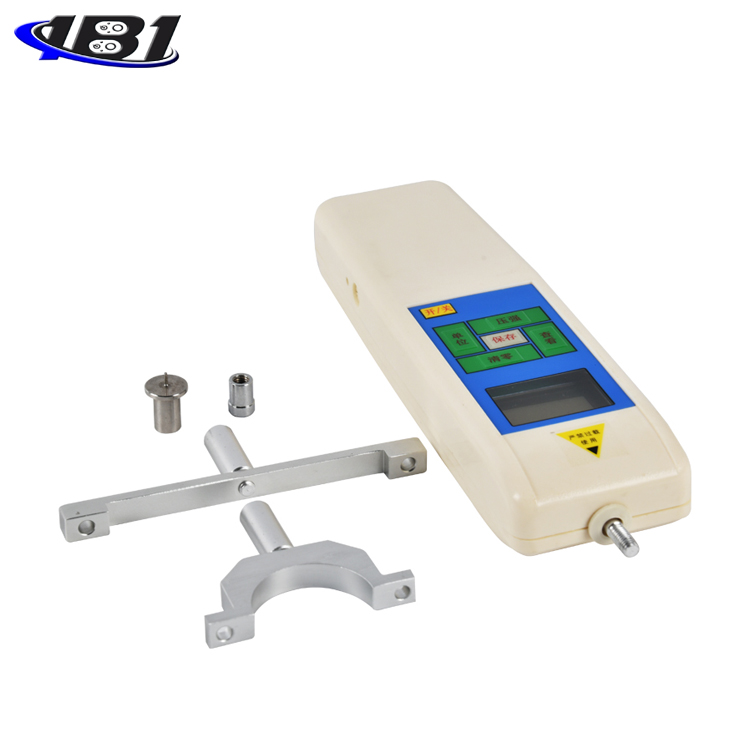
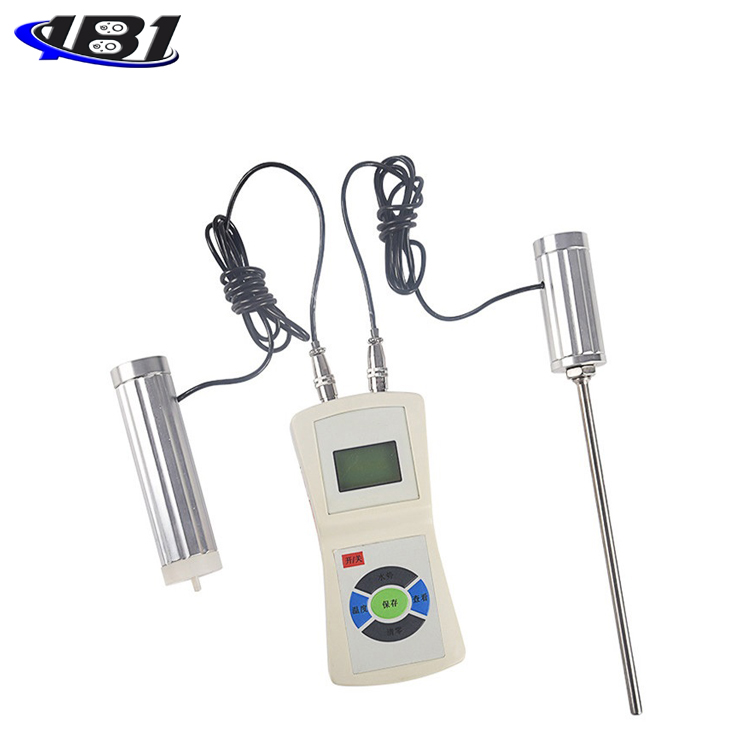
Product schematic diagram
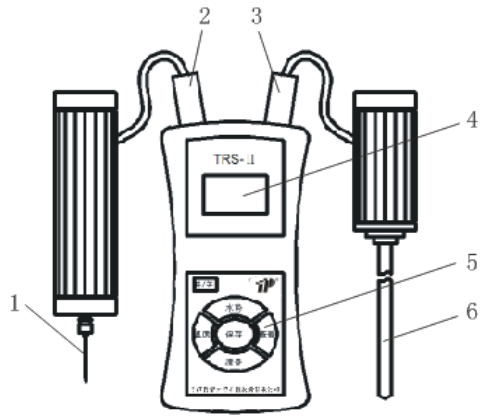
1. Water potential injection needle 2. Water potential plug 3. Temperature plug
4. LCD display 5. Function buttons 6. Temperature sensor
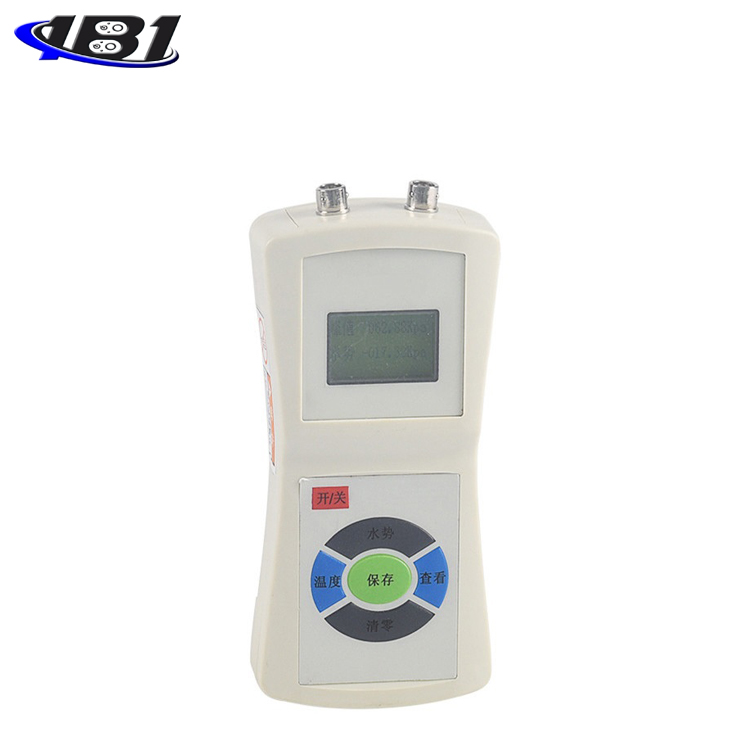
Five, display panel

Six, key description
1. On / off key: can be used to turn on and off.
2. Temperature key: No effect.
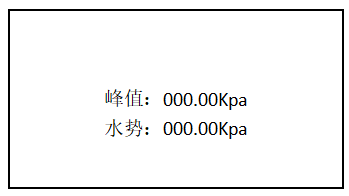
3. Water potential key: Display the current measured pressure.
4.Save key
a. In the measurement state, press this key to save the current measured water potential, time, and storage sequence.
number.
b. In the viewing state, press this key to view the next record.
c. Press this key in time adjustment state to save the currently set time.
d. Press this key in the state of auto-save setting, when saving the current setting of auto-save
between.
5.Zero key
a. Press this key in the measurement state to clear the current measurement force value (including: water potential peak
Force value, water force value, temperature force value).
b. In the query state, press this key to clear the currently stored measurement force value.
c. Press and hold this key in the query status to delete all stored records.
d. Press this key in the system menu state to cycle through each menu (including: time
Settings, auto-save settings).
e. Press this key in the state of automatic save setting to set the time of automatic save (00 ~ 60 minutes)
Clock), when set to 00, the auto save function is turned off.
f. Press this key in time setting state to adjust the current time value.
6.View key
a. Press this key in the measurement state to view the last record.
b. In the viewing state, press this key to view the previous record.
c. Press this key in the welcome interface to enter the system menu.
d. Press this key in the system menu state to enter the current menu item.
e. Press this key in the time setting state to set the year, month, day, hour and minute respectively.
Home.
User operation instructions
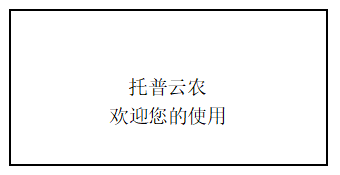
1. Startup display
Boot up to display manufacturer information and welcome to use:
User main interface display
2.Use the system menu interface
Press the On / Key to display the welcome interface, press the View button once, the display is as follows:
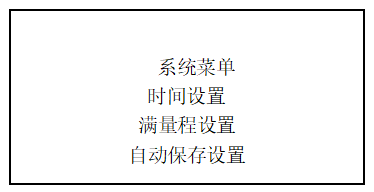
Use the clear key to select the setting item. When the user's setting item is selected, press the view key to enter the parameter setting interface.
3.Parameter setting interface
In the user setting interface, press the view key to enter the parameter setting interface, which is displayed as follows:
a.Time setting
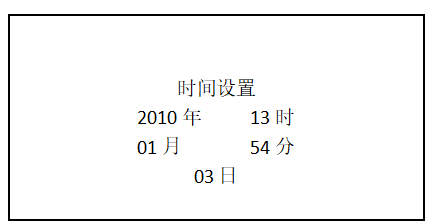
Select the setting item by clearing the key and modify the data by viewing the key. At this time, press the save key to confirm that the save is successful. (Time setting range: January 2010
00:00 on the 01st to 23:59 on the 31st of December 2030, the minimum time value is 1 minute)
b. Full-scale setting: The user is not allowed to use this setting, and the company will not guarantee the consequences.
c. Automatically save settings
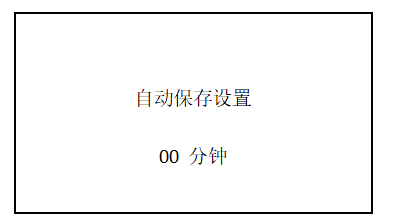
Modify the data by pressing the View button. At this time, press the Save button to confirm that the save is successful. Set auto save time (00 ~ 60 minutes). When set to 00, auto save is disabled.
Features.
Eight, test operation steps
1. Instructions for use of soil water potential temperature tester:
a. The measured force value is in the range of 0 ~ 10Kpa: it means humid, and the humidity is too high for most crops.
b. The measured force value is in the range of 10-30Kpa: it means moist and suitable for most crops.
c. The measured force value is within the range of 30 ~ 50Kpa: it means dry and wet crops need irrigation.
d. The measured force value is within the range of> 50Kpa: it means dry, and most crops need irrigation.
2. Soil water potential test method
a. Immerse the water potential probe (ceramic head) in water for more than 3 hours before use.
b. Fill the plastic tube of the water potential probe with cold water and plug the rubber stopper tightly. Drill holes at a selected buried point to a predetermined depth. Pour about 5mL of mud into the bottom of the hole and insert the water potential probe into the hole. Tamp the soil around the plastic rod. The embedding depth of the water potential probe is calculated from the distance from the middle of the ceramic tube to the soil surface.
c. The water potential probe is buried in the wet soil for 1 hour, and the soil water potential can be measured after several hours of drying the soil. Insert the aviation jack of the water potential sensor into the upper left of the display during the measurement
On the soil socket, then turn on the power switch, and press the \"\" Water Potential \"key. At this time, the display shows\" 0 \". If it is not\" 0 \", press \" Clear \"to set the current pressure value. Is the zero reference point. By inserting the injection needle on the measuring cylinder into the rubber plugs of each water potential probe one by one, the water potential data of each measurement point can be read from the display screen. Readings should be taken in the morning with small temperature changes.
d. Turn off the power after the test.
c. Calculation:
Soil water potential (KPa) = water potential reading-probe water column height (cm) /10.2.
In the formula: 10.2: refers to the conversion coefficient of centimeters of water column height to kilopascals (KPa).
Probe water column height: refers to the height from the lower edge of the rubber stopper to the center of the ceramic head.
3.Temperature measurement
When measuring, insert the aviation socket of the temperature sensor probe into the upper right socket of the monitor, then turn on the monitor's power switch and press the \"\" Temperature \"key. If the soil is hard, you can use the iron rod to help punch holes to the location where you need to measure. Just push in the thank you device.
Steps for battery replacement
After using for a period of time, if the backlight function cannot be realized when the keys are operated after the power is turned on, and the function keys cannot be operated normally, it means that the battery has run out and needs to be replaced with a new
battery.
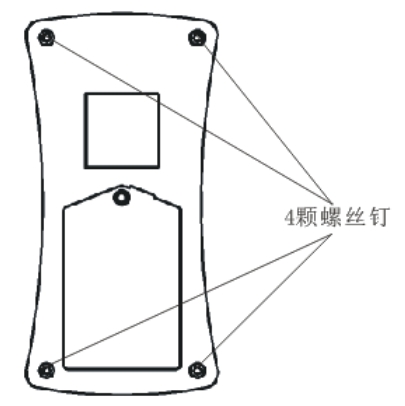
1. Use a screwdriver to remove the four screws (as shown in the figure below) on the back of the monitor's rear case, and then remove the monitor's rear case.
2. After removing the back cover of the monitor, you will find that there is a battery inside the back cover of the monitor. Remove the used batteries and replace them with new spare batteries.
3. Close the back case of the monitor and the front case, and screw the 4 screws that were removed to fix the battery.
Ten, matters needing attention, maintenance and repair
1.Frequency of adding water to the water potential probe
The water potential probe buried in the field will gradually increase the air bubbles in the instrument. The increase rate is related to soil dryness. To maintain the sensitivity of the instrument, the rubber should be turned on regularly
Fill the tube with water. The interval of the first water addition can be judged based on the measured soil water potential:
When the soil water potential is measured in the range of 0-20KPa, water is added once every 12 days.
When the soil water potential is measured in the range of 20 ~ 50KPa, water is added once every 7 days.
When the soil water potential is measured in the range of> 50KPa, water is added once every 5 days.
Each water addition was performed after taking a reading on the day.
2.Replacement of rubber stoppers
The rubber plug of the water potential probe should be tightly closed. The leather stopper is made of neoprene, which is not easy to age and has good elasticity. The leather plug will not leak after acupuncture. If air leakage occurs during long-term use,
Replaceable rubber cap. Each water potential probe is equipped with 3 leather plugs.
3. Replacement of injection needle
If the injection needle breaks, it should be replaced with a new one.
4. Do not knock on the LCD screen and place objects on the LCD screen.
5. Do not press the function keys with nails, sharp objects or pointed objects.
6. Handle gently during use and handling.
7. Do not disassemble, repair or modify the machine yourself. These actions may cause permanent failure of the instrument.
8. If any trouble occurs, please contact the place of purchase or the company.
9. Within one month from the date of sale of this product, product quality problems occur under normal use and no damage to the appearance. The customer must present the original sales invoice, valid warranty card and
Complete packaging to the original place of purchase or the company to replace the product of the same specifications and models, after the replacement of the product continues the warranty period and terms of the original product.
10. Within one year from the date of sale of this product, under normal use, non-human causes occur.
Obstacles are covered by the warranty (the user disassembles the machine or repairs at other service points by the company without warranty),
Customers who contact the original place of purchase with the original sales invoice and a valid warranty card will receive the company's free
one year warranty.
11. The warranty terms of this product are only applicable to DRS-Ⅱ series products sold in the Chinese market.
For products that exceed the replacement period and warranty period, customers can inquire about maintenance issues at the original place of purchase or
Contact our company for paid maintenance.
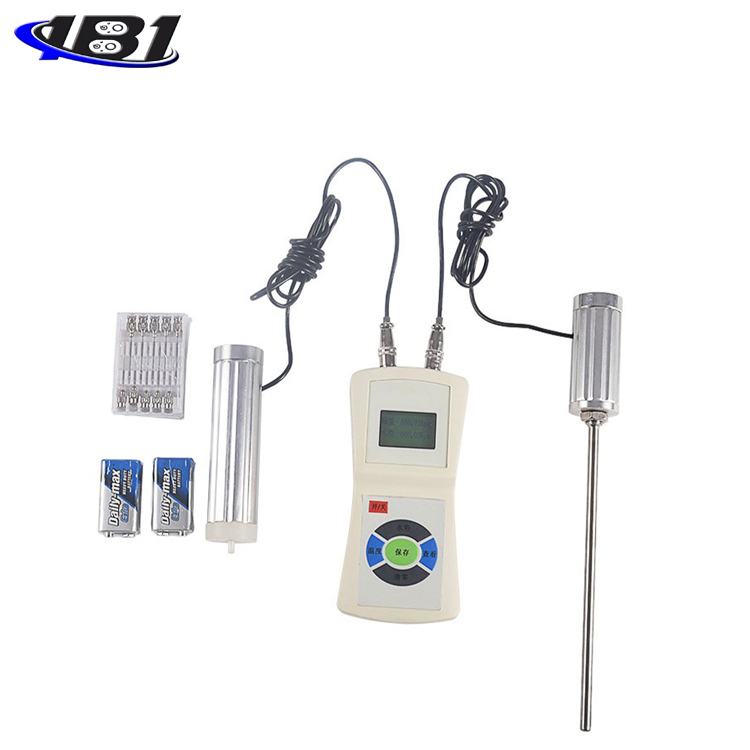
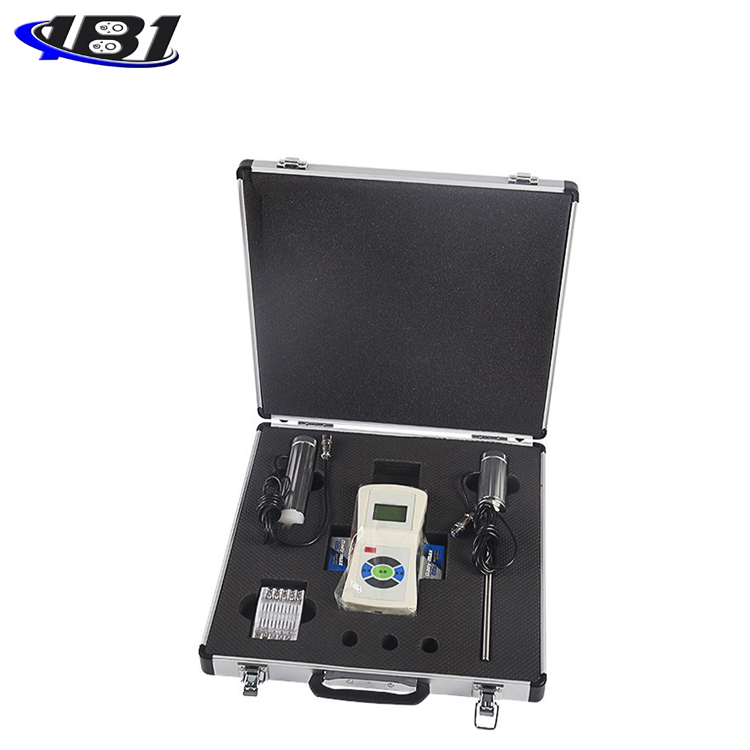
Eleven, packing list
Dear Customer:
Hello! Thank you very much for choosing our company's soil water potential temperature measuring instrument. When you buy
Please check whether the accessories are complete.
|
Serial number |
Name |
Number |
|
1 |
Measuring table |
1 set |
|
2 |
Water momentum |
1 |
|
3 |
Temperature head |
1 |
|
4 |
Medical needle |
2 bags |
|
5 |
Rubber stopper |
3 |
|
6 |
Water potential probe |
5 sets |
|
7 |
Cube battery |
2 |
|
8 |
user's manual |
1 serving |
|
9 |
Inspection certificate |
1 serving |
|
10 |
Certificate of Warranty Card |
1 piece |