support hotline
0577-57572522
I. System Overview
1.1 Main uses and scope of application
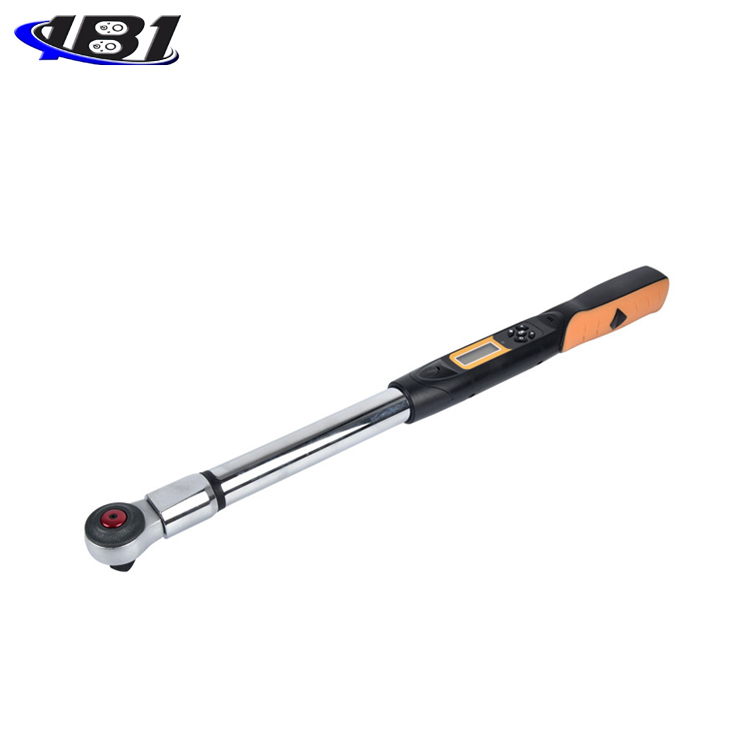
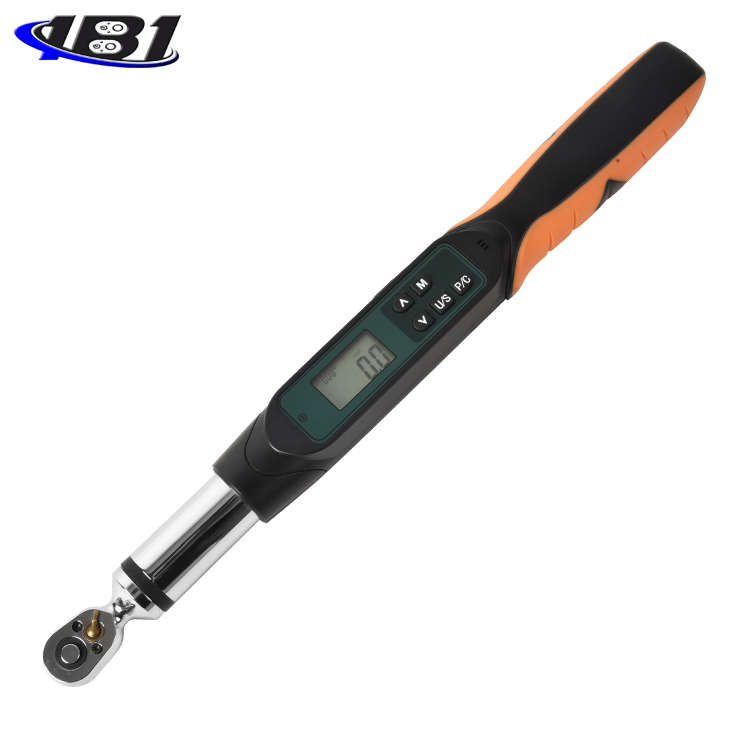
EWA digital torque wrench with angle display is a new type of digital display wrench. The torque-angle value can be read directly and accurately. It is simple to use and easy to operate. Suitable for bolt fastening and control in automobile industry, machinery industry, etc.
1.2 Features
1.2.1 Torque-angle value can be read directly;
1.2.2 ± 1 ° (rotate 90 ° at 30 ° / sec);
1.2.3 ± 1%;
1.2.4 Can be measured clockwise and counterclockwise;
1.2.5 Buzzer, LED and vibrator remind target value;
1.2.6 Four types of torque units: N.m, kfg.cm, ft.lbf, in.lbf, etc.
1.2.7 Angle unit is degree (°)
1.2.8 Comes with a 3.7V lithium battery, which can be directly charged via USB;
1.2.9 Comes with a USB interface to upload and save data.
1.2.10 Measurement mode: real-time mode, peak mode and preset mode.
1.2.11 Automatic backlight function;
1.3 Specifications
|
model |
Without communication |
EWA2 -0010 |
EWA2 -0030 |
EWA3-0030 |
EWA3-0060 |
EWA3-0085 |
EWA3 -0135 |
EWA4 -0135 |
EWA4 -0200 |
EWA4 -0340 |
EWA6- 0500 |
EWA6- 0850 |
|
With communication |
EWA2 -0010R |
EWA2 -0030R |
EWA3-0030R |
EWA3-0060R |
EWA3-0085R |
EWA3 -0135R |
EWA4 -0135R R |
EWA4 -0200R |
EWA4 -0340R |
EWA6- 0500R |
EWA6- 0850R |
|
|
Minimum division value |
0.01 |
0.1 |
||||||||||
|
Maximum operating range (N.m) |
10N.m / 7.37ft.lb / 88.50in.lb / 101.97kgf.cm |
30N.m / 22.12ft.lb / 265.5in.lb / 305.91kgf.cm |
30N.m / 22.12ft.lb / 265.5in.lb / 305.91kgf.cm |
60N.m / 44.25ft.lb / 531.04in.lb / 611.82kgf.cm |
85N.m / 62.69ft.lb / 752.31in.lb / 866.75kgf.cm |
135N.m / 99.57ft.lb / 1195in.lb / 1376.61kgf.cm |
135N.m / 99.57ft.lb / 1195in.lb / 1376.61kgf.cm |
200N.m / 147.5ft.lb / 1770in.lb / 2039.43kgf.cm |
340N.m / 250ft.lb / 3009in.lb / 3467.03kgf.cm |
500N.m / 4424in.lb / 368.7ft.lb / 5098.58kgf.cm |
||
|
Connector (inches) |
1/4 |
3/8 |
1/2 |
3/4 |
||||||||
|
length |
390 |
420 |
535 |
655 |
|
|||||||
|
Torque accuracy * 1 |
± 1% |
|||||||||||
|
Angular accuracy |
± 1 ° (accuracy measured at an angle of 90 ° to 90 ° per second) |
|||||||||||
|
Data storage capacity |
255 |
|||||||||||
|
Operation mode |
Peak mode (P) / Real-time mode (T) / Preset mode (Pre) |
|||||||||||
|
unit |
N.m, kgf.cm, ft.lbf, in.lbf |
|||||||||||
|
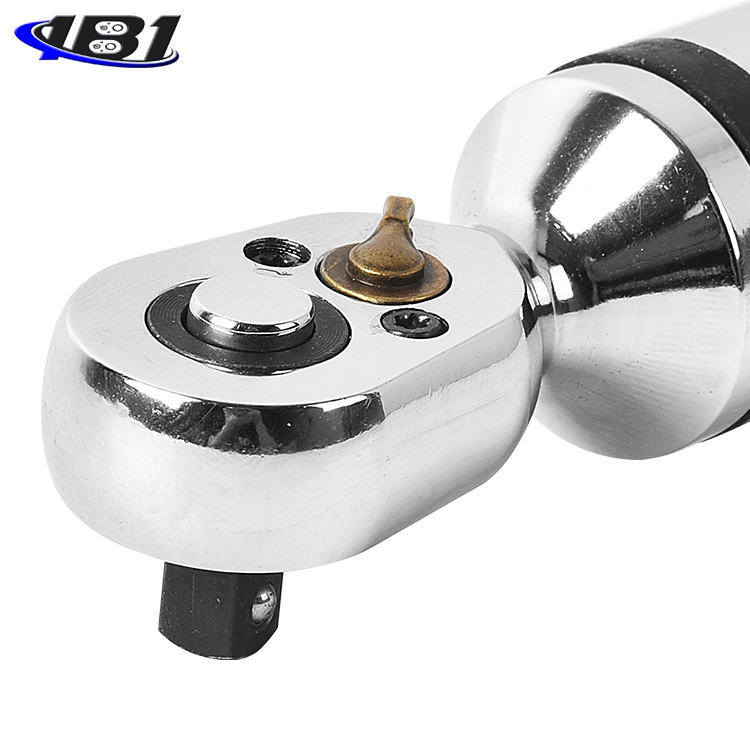
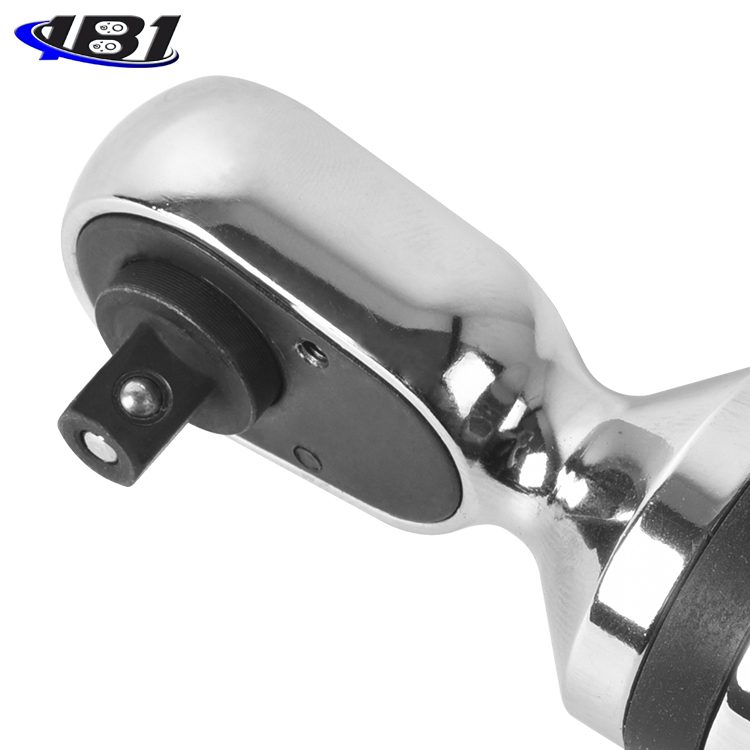
Ratchet head form |
Two-way ratchet head |
|||||||||||
|
Number of teeth of ratchet head |
36 |
48 |
||||||||||
|
Number of keys |
5 |
|||||||||||
|
battery |
3.7V lithium battery |
|||||||||||
|
Operating temperature |
-10 ℃ ~ 60 ℃ |
|||||||||||
|
storage temperature |
-20 ℃ ~ 70 ℃ |
|||||||||||
|
humidity |
90% without condensation |
|||||||||||
|
Drop test height |
1 meter |
|||||||||||
|
Vibration test conditions * 2 |
10G |
|||||||||||
|
Life test * 3 |
10,000 times |
|||||||||||
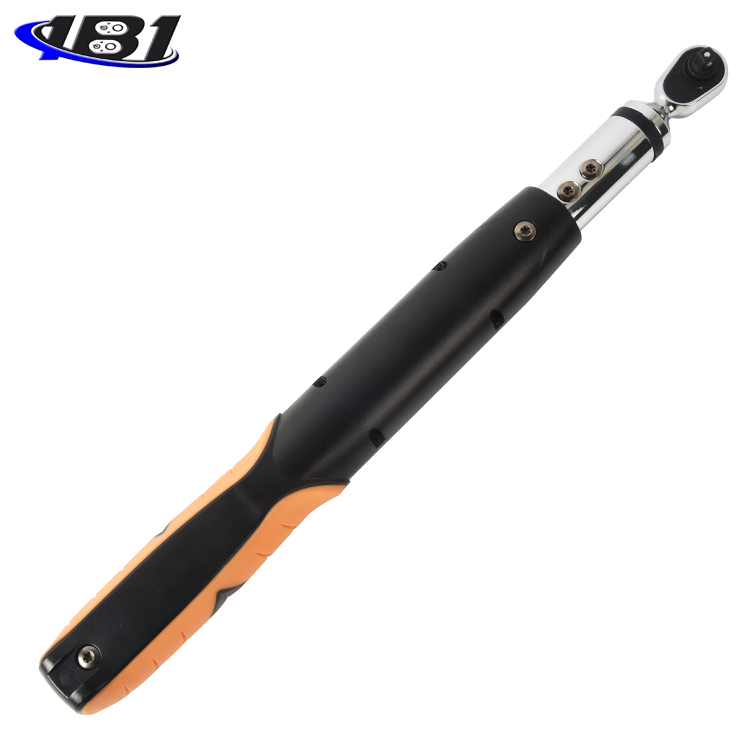
Product components
2.1 Product Structure
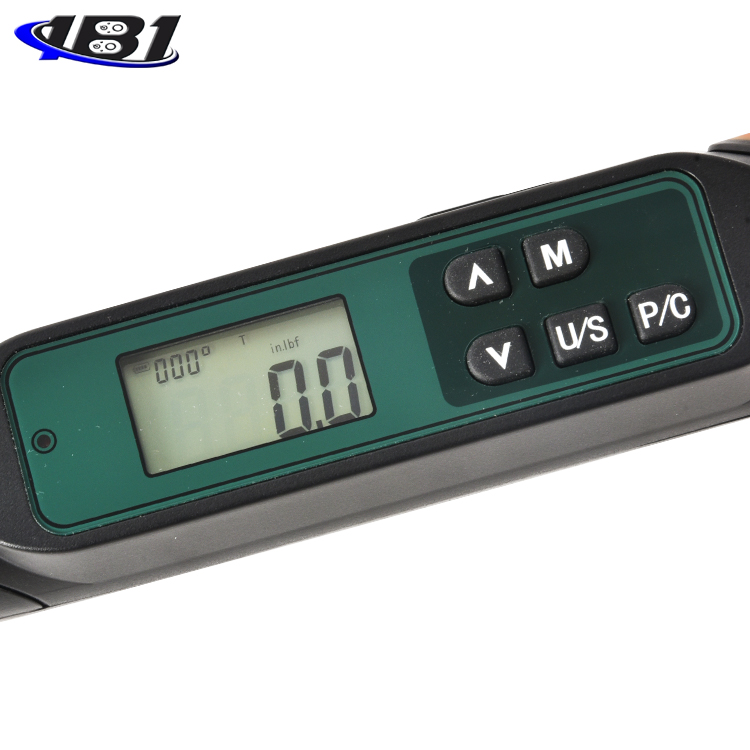
2.2 LCD display
1.Two-way ratchet head 2.Steering paddle
3.LED indicator 4.LCD screen
5.Key 6.Buzzer
7.Battery box 8.Battery cover
9, ratchet torque square head 10, USB / charging interface
11.Charge indicator 12.Grip
13.Battery level display 14.Angle value display
15.Working mode 16.Unit display
17.Torque direction18.Torque value display
19.Up / preset value unlock button 20.Storage/view button
21.Down / working mode switch button 22.Unit switch / menu button
23.Power / Zero reset button
3. Description of working mode
3.1 Working mode switching
3.2 Real-time mode operation
The real-time measurement mode follows the applied torque value and the rotation angle value (when the rotation angle value is calculated, the selected angle starts to be calculated when the torque value is greater than 0). When the torque is unloaded and the torque value reaches zero, the angle is automatically cleared.
When the LCD screen displays T, it is in real-time mode. If T is not displayed, press \"![]() \"Key to switch modes. The operation steps are shown in the figure below:
\"Key to switch modes. The operation steps are shown in the figure below:
NOTE1: In real-time mode, when the torque value is greater than 0, the angle value will be displayed.
NOTE2: In real-time mode, when 90% of the preset target force value is reached, the red light flashes and the buzzer sounds shortly after the buzzer is turned on; when the vibrator is turned on, the red light flashes, the vibrator intermittently vibrates, and the vibration frequency is based on Torque proximity increases vibration frequency
NOTE3: In the real-time mode, when the buzzer is turned on, when the target torque value is reached or greater, the red light stays on and the buzzer stays on. When the vibrator is on, the red light stays on and the vibrator continuously vibrates.
NOTE4: The buzzer and vibrator cannot be enabled at the same time. If the user turns on the buzzer, the vibrator turns off automatically; if the user turns on the vibrator, the buzzer turns off automatically.
3.3 Peak Mode
In the peak measurement mode, when torque is applied, the wrench will lock the maximum applied torque and the maximum angle and display it on the LCD screen. When the torque is unloaded, the peak torque and peak angle will be locked, and the LCD will not update the locked peak when it is reloaded. When the automatic save function is turned on, the wrench will automatically save the force value and angle, and automatically clear it. When the next measurement is required, directly load the torque. When the auto-save function is not enabled, you can save by pressing \"M \" key or clear it by pressing \"P / C \" key.
The LCD screen displays P as the peak mode. If P is not displayed, press \"![]() \"Key to switch. The operation steps of peak mode are shown in the figure below:
\"Key to switch. The operation steps of peak mode are shown in the figure below:
NOTE1: In the peak mode, when the torque value is greater than 0 in the first measurement, the wrench displays the angle and torque value; but when the force is continued (without clearing and saving the value), the torque value in this measurement is greater than the first measurement The angle value will follow the torque value when the force value is changed.
NOTE2: In the peak mode, when 90% of the preset target torque value is reached, after the buzzer is turned on, the red light flashes and the buzzer sounds shortly; when the vibrator is turned on, the red light flashes and the vibrator vibrates continuously.
NOTE3: In the real-time mode, when the buzzer is turned on, when the preset target torque value is reached, the red light stays on and the buzzer stays on. After the vibrator is turned on, the red light stays on and the vibrator vibrates continuously.
NOTE4: The buzzer and vibrator cannot be enabled at the same time. If the user turns on the buzzer, the vibrator turns off automatically; if the user turns on the vibrator, the buzzer turns off automatically.
3.4 Preset Mode
The preset mode is designed to continue to give the screw a certain angle after the torque value reaches the target value. When the applied torque value is greater than or equal to the target torque value, the wrench starts to calculate the angle value. When the torque is unloaded, the torque value and angle value are automatically locked.
The LCD screen displays Pre as the preset mode. If Pre is not displayed, press \"![]() \"Key to switch. The operation steps of preset mode are shown in the figure below:
\"Key to switch. The operation steps of preset mode are shown in the figure below:
NOTE1: In preset mode, the wrench will only display the angle when the preset target torque value is reached.
NOTE2: In preset mode, when the preset target torque value reaches 90%, the red light flashes.
NOTE3: In the preset mode, after the buzzer is turned on, when the preset target torque value is reached, the red light will stay on and the buzzer will sound short; after the vibrator is turned on, the red light will stay on and the vibrator will continue to vibrate.
NOTE4: The buzzer and vibrator cannot be enabled at the same time. If the user turns on the buzzer, the vibrator turns off automatically; if the user turns on the vibrator, the buzzer turns off automatically.
Method of use
4.1 boot
Short press the\"\" P / C \"key to turn on the machine. If the battery level is insufficient after the start, it will automatically turn off and can be used normally after charging.
4.2 Unit switching
4.3 Setting preset values
First press \"P / C \" to boot, press \"![]() \"Key to determine whether the key lock is turned on. If the key lock is turned on, you can turn off the key lock function through the\"\"Key Lock\"\"in the system settings (for details, see\" System Settings\"below). On, the letter \"will be displayed
\"Key to determine whether the key lock is turned on. If the key lock is turned on, you can turn off the key lock function through the\"\"Key Lock\"\"in the system settings (for details, see\" System Settings\"below). On, the letter \"will be displayed![]() \", Then you can press \"
\", Then you can press \"![]() \"Key to increase the target value, or press \"
\"Key to increase the target value, or press \"![]() \"Key to decrease the target value. After setting, press \" U / S \"key to save and exit.
\"Key to decrease the target value. After setting, press \" U / S \"key to save and exit.
4.4 Clearing
① When the wrench force value is 0, press the\"\" P / C\"\" key and the\"\"![]() \", Which means that the angle calibration is cleared. When the angle is cleared, please place the wrench on a flat surface until the angle is cleared.
\", Which means that the angle calibration is cleared. When the angle is cleared, please place the wrench on a flat surface until the angle is cleared.
② When the force value of the wrench is displayed, press \"P / C \" to directly clear the force value, and the angle is not cleared.
4.5 Data saving and viewing
4.5.1 Data storage
①Short press the\"\" M\"\" key on the measurement interface to display the\"\"![]() \", It means that the save was successful. When the force value is zero, it cannot be saved, it will prompt \"
\", It means that the save was successful. When the force value is zero, it cannot be saved, it will prompt \"![]() \".
\".
② Auto save: In the peak mode and preset mode, when the auto save time is set to 0 in the system settings, the wrench will automatically save the torque value. When the auto-save time is 0, the wrench does not automatically save the torque value. The user needs to manually press the\"\" M\"\" key to save the torque value.
4.5.2 View saved data
Press the\"\" P / C \"key to turn on or in the start-up measurement interface, press and hold the\"\"M \" key for a long time to view the saved data, and you can pass in the data viewing interface, \"![]() \"or\"
\"or\"![]() \"Key to view the saved record. When the view is completed, press \" U / S \"key to exit.
\"Key to view the saved record. When the view is completed, press \" U / S \"key to exit.
4.6 Delete stored data
① In the measurement interface, press and hold the\"\" M \"key for a long time to enter the data view interface, then press the\"\"P / C \" key for a short time to display the\"\"![]() \",or\"
\",or\"![]() \", When displayed \"
\", When displayed \"![]() \", Then press the\"\"U / S \" key to display \"
\", Then press the\"\"U / S \" key to display \"![]() \"Means that all data is deleted (this instrument cannot delete data one by one).
\"Means that all data is deleted (this instrument cannot delete data one by one).
② On the measurement interface, press and hold the\"\" M\"\" key to enter the data view interface, and then press the\"\" P / C\"\" key to display the\"\"![]() \", Continue to press \" P / C \"to switch the display \"
\", Continue to press \" P / C \"to switch the display \"![]() \", And then press the\" U / S \"key to return directly to the measurement interface, indicating that the data will not be deleted.
\", And then press the\" U / S \"key to return directly to the measurement interface, indicating that the data will not be deleted.
4.7 System settings
4.7.1 Angle setting: The setting range is 0 ~ 999, users can press \"![]() \"Key and \"
\"Key and \"![]() \"Key to set the value you want. When the angle is displayed as 999, it will increase to 0 when you increase it. Similarly, when the angle is displayed as 0, press \"
\"Key to set the value you want. When the angle is displayed as 999, it will increase to 0 when you increase it. Similarly, when the angle is displayed as 0, press \"![]() When the \"key is decreased, the angle will jump to 999.
When the \"key is decreased, the angle will jump to 999.
4.7.2 Key lock: For the preset target torque value. Users can press \"![]() \"Key and \"
\"Key and \"![]() \"Key to set the key lock on or off, \" 1 \"is on, \" 0 \"is off.
\"Key to set the key lock on or off, \" 1 \"is on, \" 0 \"is off.
4.7.3 Auto-save time: The range can be set from 0 to 5 (seconds). 0 means to turn off the auto-save function. Users can press \"![]() \"Key and \"
\"Key and \"![]() \"Key to set auto save time.
\"Key to set auto save time.
4.7.4 Buzzer: Set the buzzer on or off. 1 is on, 0 is off. Users can press \"![]() \"Key and \"
\"Key and \"![]() \"Key to set the buzzer on or off.
\"Key to set the buzzer on or off.
4.7.5 Vibrator: Set the vibrator on or off. 1 is on, 0 is off. Users can press \"![]() \"Key and \"
\"Key and \"![]() \"Key to set the vibrator on or off.
\"Key to set the vibrator on or off.
4.7.6 Automatic shutdown: Automatic shutdown time setting. The range can be set from 0 to 30 (minutes). 0 is to turn off the automatic shutdown function, the user can press \"![]() \"Key and \"
\"Key and \"![]() \"Key to set your own required auto-off time.
\"Key to set your own required auto-off time.
4.7.7 Restore factory settings: This function allows the instrument to restore the factory settings. By pressing \"![]() \"Key and \"
\"Key and \"![]() \"Key to select \"
\"Key to select \"![]() \"(Restore factory settings) or \"
\"(Restore factory settings) or \"![]() \"(Do not restore factory settings). If you choose to restore factory settings, select \"
\"(Do not restore factory settings). If you choose to restore factory settings, select \"![]() \"After a short press of the\" U / S \"key, the LCD screen will appear \"
\"After a short press of the\" U / S \"key, the LCD screen will appear \"![]() \"(The factory settings have been restored), and the system automatically returns to the measurement interface. If you choose not to restore the factory settings, select \"
\"(The factory settings have been restored), and the system automatically returns to the measurement interface. If you choose not to restore the factory settings, select \"![]() \".
\".
V. Communication and uploading data
This wrench adopts USB communication mode, which can upload the saved data to the PC, and also upload the real-time measurement data to the PC.
Use the CD-ROM provided by the manufacturer, install the communication software on the computer, and then connect the digital display wrench to the computer with a data cable when the digital display wrench is turned on. Double-click the software icon to open the software. First select\"Com No\" \", Then click \" Part Open \", and then click\" Upload \". At this time, the stored data in the instrument will appear on the form, indicating that the upper computer has been successfully connected and the purpose of reading the stored data has been reached. As shown below:
Communication settings: Baud rate 4800, 8 data bits, no parity, 1 stop bit.
Communication format:
3 byte data header + 1 byte function code + 2 byte data length + N byte data length + 1 byte checksum
Header: 0xEB 0x00 0x55
|
function code |
meaning |
example |
|
F0 |
PC sends handshake instruction to wrench |
Instruction: EB 00 55 f0 00 00 30 |
|
F1 |
Wrench handshake confirmation instruction to PC |
Return instruction: EB 00 55 F1 00 00 62 |
|
F5 |
PC asks wrench to store data |
Instruction: EB 00 55 f5 00 00 35 |
|
01 |
Spanner sends span data |
Return instruction: EB 00 55 01 00 02 00 1E C2 |
|
02 |
Wrench send stored data size |
Return instruction: EB 00 55 02 00 02 00 06 94 |
|
03 |
Wrench send stored data size |
Return instruction: EB 00 55 03 00 12 00 01 00 00 00 00 00 00 00 00 00 02 00 00 00 00 00 00 B8 |
|
04 |
Wrench sent data has been sent |
Return instruction: EB 00 55 04 00 00 88 |
|
FC |
PC requests real-time data |
Instruction: EB 00 55 FC 00 00 3C |
Seven, prompt information
|
Information |
meaning |
Solution |
|
ER-2 |
Memory exception |
The memory is full, or the memory is damaged. Clear stored data or return to factory for repair. |
|
ER-3 |
Sensor or circuit board abnormal |
The force value is greater than 5% clearing point, and the unloading force value is cleared again. If the unloading force value cannot clear the error message, return to the factory for repair. |
|
ER-4 |
Overrange |
If it exceeds 120% of full scale, it will prompt ER-4. After unloading force value, press [P / C] key to clear the error. |
|
SUCC |
Prompt operation completion |
When an operation is completed, it returns automatically. |
|
Fail |
Prompt operation failed |
An operation fails and returns automatically. |
Eight, maintenance and storage
8.1 Note:
To maintain good accuracy, it is recommended to recalibrate about every year.
8.2 Excessive torque may cause damage or loss of accuracy (over 105% of the maximum torque range).
8.3 Do not shake the wrench violently or drop the wrench on the ground.
8.4 Do not use the wrench as a hammer.
8.5 Do not place the wrench in a place with high temperature, high humidity or direct sunlight.
8.6 Do not use a wrench near water.
8.7 If you accidentally wet the wrench, wipe it off immediately with a dry towel. Salt in seawater can damage the wrench.
8.8 Do not use an organic solvent to clean the wrench, such as alcohol or paint thinner.
8.9 Do not place the wrench near magnetic objects.
8.10 Do not place the wrench in a place with a lot of dust or sand. This will cause serious damage to the wrench.
8.11 Do not press on the LCD screen.
Nine, random attachments
|
1 |
lithium battery |
1 section |
|
2 |
Manual |
1 serving |
|
3 |
Battery cover key |
1 |
|
4 |
Certificate of conformity |
1 serving |
|
5 |
Warranty Card |
1 serving |
|
6 |
Inspection certificate |
1 serving |
|
7 |
Desiccant |
1 package |